.: Hill Hold Assist
On this page well concentrate on showing how to follow the factory routing. The Passenger side is obviously easier but not the correct routing for where we need to get the wires to. The time you would save in routing through the passenger side you'll loose in the engine compartment.
The Install
With the top of the engine compartment completed it's time to move to the lower section. Note that if you are doing this route you do not need to open the ECU compartment.
First step is to raise the vehicle and take off the left front wheel. This will give you much better access to the wiring and screws/clips to remove the liner. If you need instructions on how to jack up and remove the wheel then this may not be the mod for you ;)
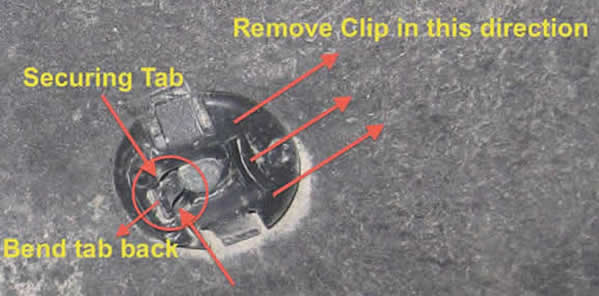
Removing the wheel liner isn't difficult once you understand the clips. The liner is not as fragile as it feels and you can bend and manoeuver it within reason.
To remove the clips you need to bend the plastic securing tab back then slide the clip off of the mount. It's tricky at first but once you get the hang of it it's not bad. You can use a pic tool to pull the retainer up or use a pair of needled nose pliers and just squeeze the edges together to get it to open. Don't worry if you bend the retainer, it will bend back down.
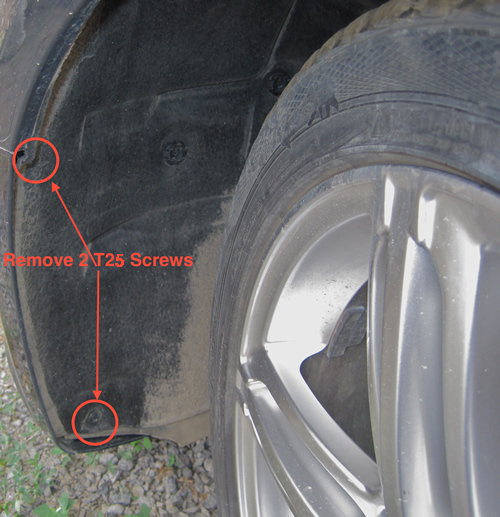
One you have the tire off remove the 2 T25 shown. (yes I know the tire is on in this picture)
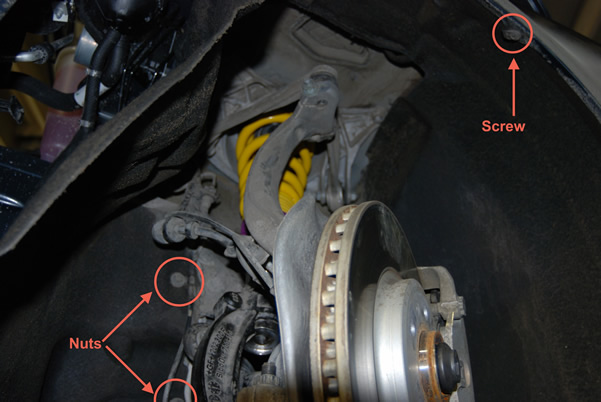
Here you can see another screw at the top of the fender. While working on a 2009 I noticed it didn't have a screw there and actually had a plastic clip. So your version may differ.
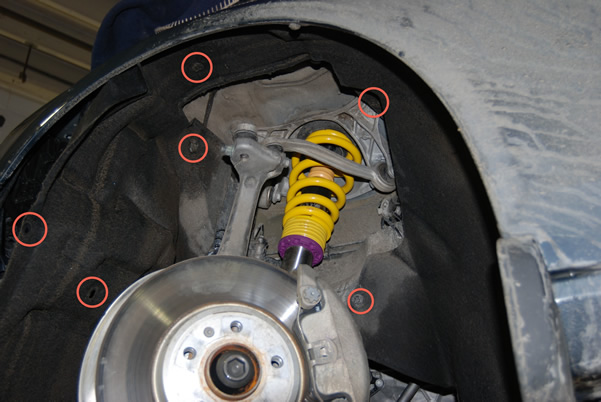
This may not be all of them but I've marked off the clips I could see. I think there is 2-3 that aren't visible in the picture.
With the liner out its time to remove the washer reservoir.
It's a good idea to get a catch tray or large bowl to catch the washer fluid.
First step is to unplug the connectors for the pumps. You wont be able to get to the headlight washer pump (if equipped) until the reservoir starts to come out. Once the connectors are undone you can remove the hose from the lower pump. This is done by sliding the clip on the washer line up then pulling the hose off.
You can now remove the two bolts that hold the reservoir in place. Remember there is one more pump to disconnect if you have headlight washers.
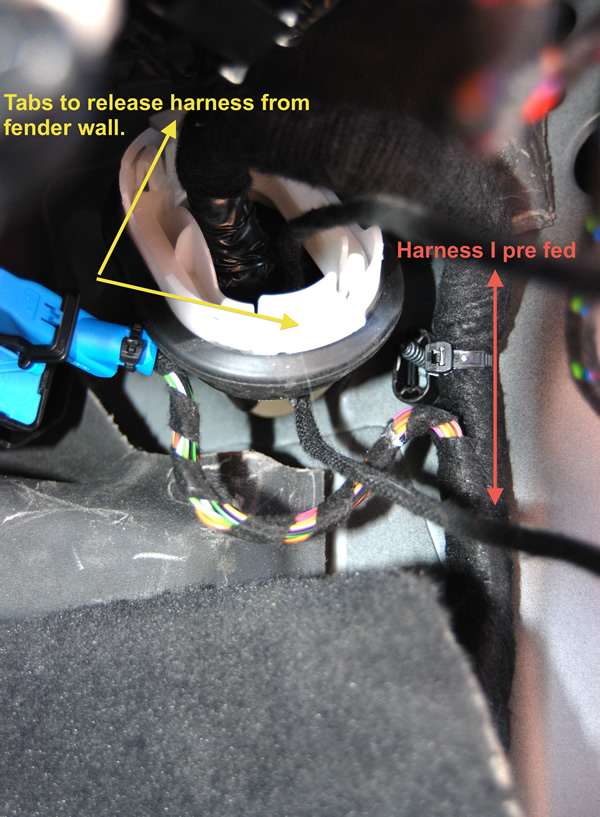
Pull the filler out to get better access to the entry point behind the Fender. You will most likely feed your wires from the inside then pull them through.

This is the passenger side but is identical to the drivers. You can squeeze the white retaining clips and pull the harness out of the hole. I did this to make it easier to put a hole in the boot and feed my wires through. You can see the loop of the harness I pre installed.
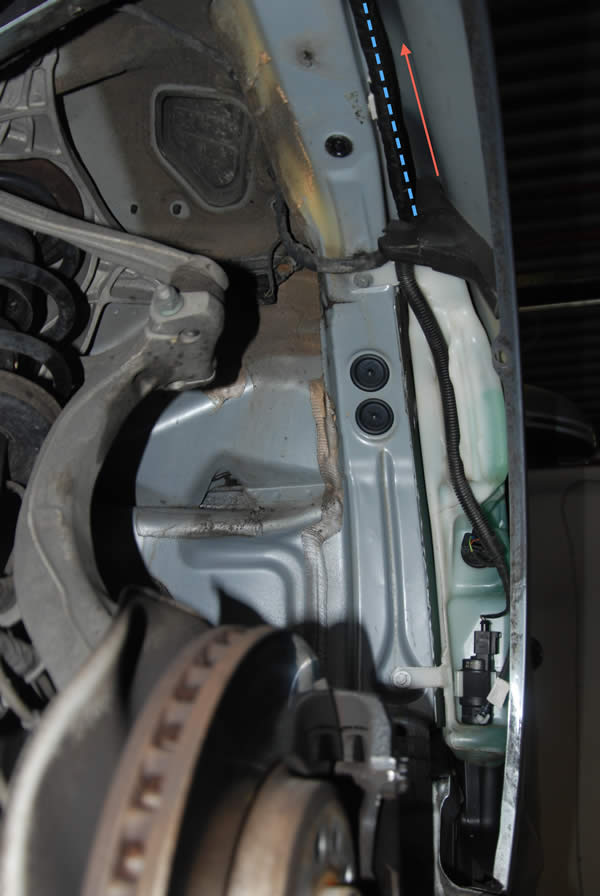
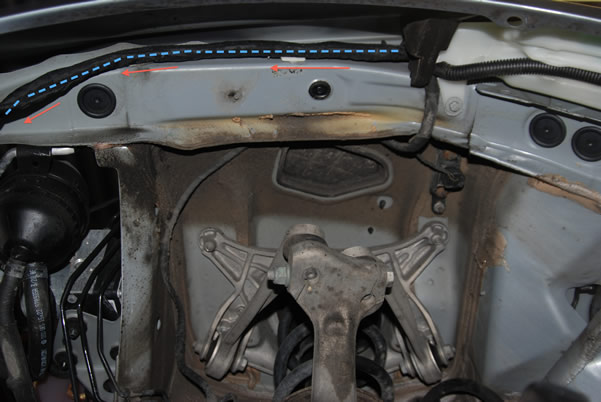
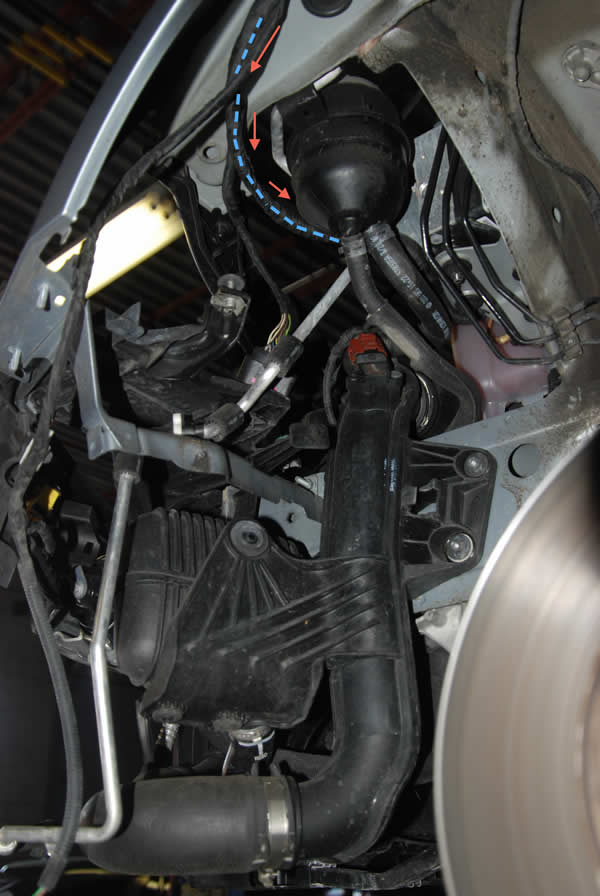
You'll now be able to follow the factory wiring harness all the way to the ABS module. Just use some small zip ties to secure the line.
The next few pictures will show the route to the ABS unit using the factory route.

On to the next page (wiring).
Please note: AudiEnthusiast.com is in no way associated to Audi or VW in any way shape or form. All brand names and manufacturers listed here are for informational purposes only and are in no way endorsed by AudiEnthusiasts.com unless stated other wise.
WARNING!! All modifications and changes are done at your own risk. This site in no way approves the modifications performed here for your vehicle. Please check with your dealer before performing any changes as they may void portions of your factory warranty.