.:Hill Hold Assist
One of my favorites. As with the TPMS coding you must have the proper ABS unit to activate this feature. The easiest way to tell is to look at the PR sticker in the trunk near the spare tire or your service manual as it should be there. If you see 1AS you can't install this, if you see 1AT then you are safe to move forward. You can replace your ABS unit without going to the dealer if you are very intent on getting this option. I had to go that route and I pre warn you that the cost for a new ABS unit is very high. Now that the model is getting older more are showing up in wrecking yards and on eBay so shop around .
For more information on the ABS unit check out the information on the TPMS page. It's a bit dated but still has relevant information. Here's the link: TPMS Activation
This is a fairly easy yet time consuming modification so I would rate it 5 out of 10 for difficulty.
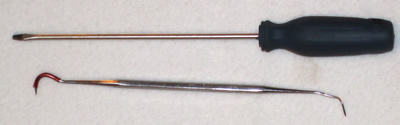
Tools:
Small tool with hooked end to pull out AC controller
Small flat head screwdriver
Trim removal tool or similar tool
Selection of small sockets (8mm-13mm)
T25 and T30 Torx (optional read instructions for wire routes)
Soldering Iron
Heat Gun
Parts:
Hill Hold Switch:
(LHD) 8K1 927 225 C WEP
(RHD) 8K2 927 225 C WEP
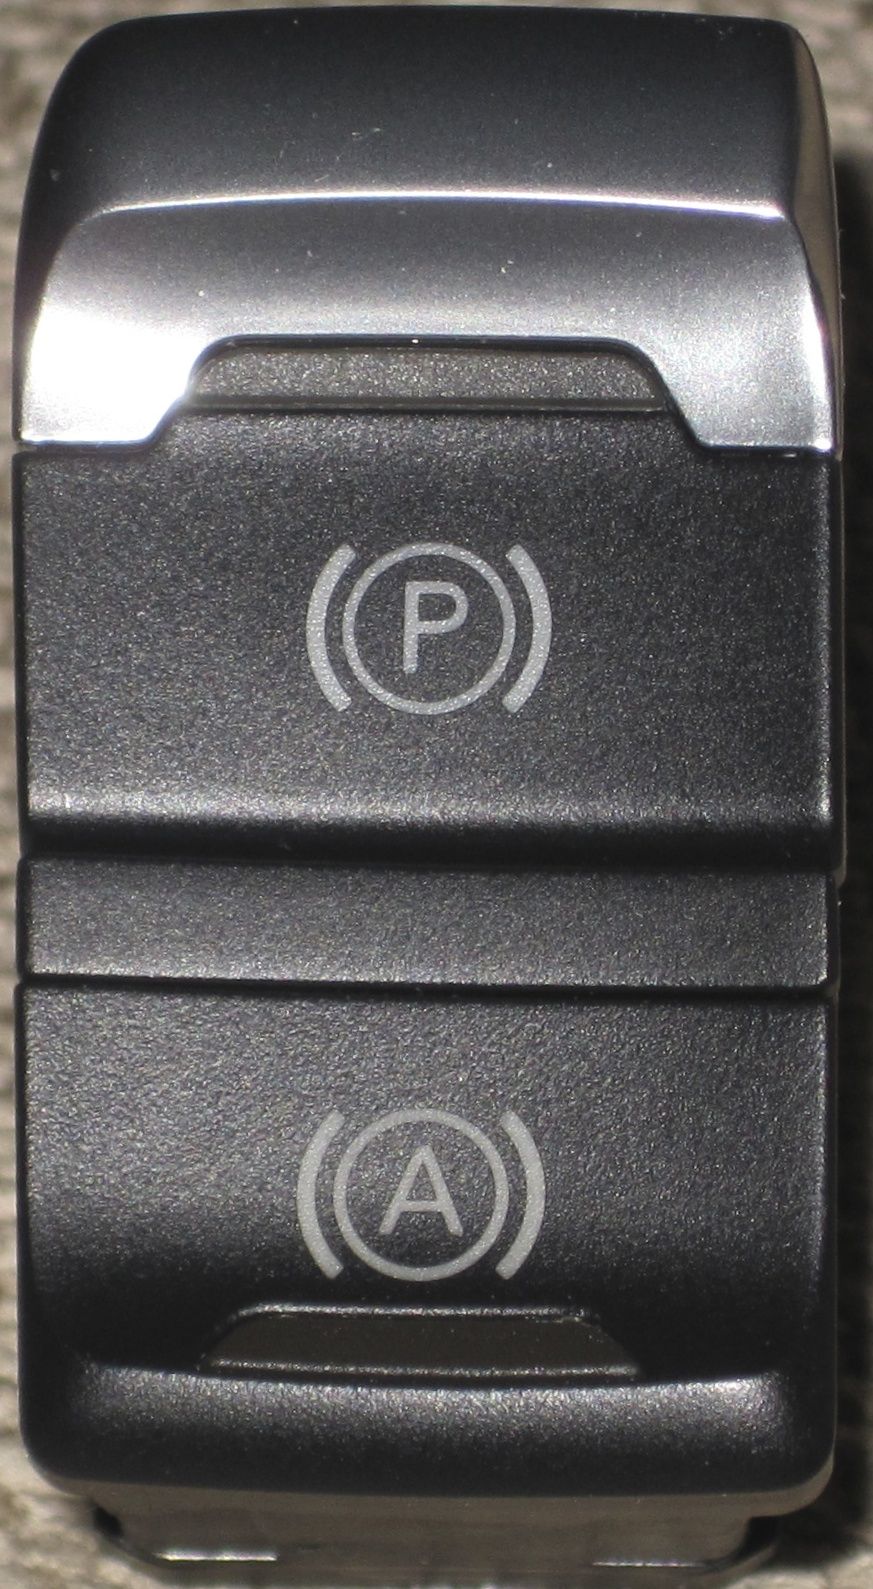
After 03/12 Audi shows C being dropped and D replacing it. So if you can not order a C revision you may be fine getting a D.
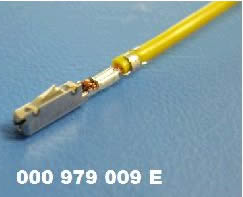
2 - 000 979 009 E repair wires for switch. You need 3 in total and each wire has 2 ends.
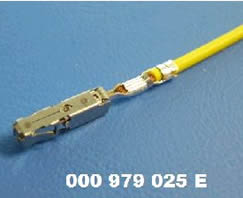
1 - 000 979 025 E- Both ends needed for ABS unit connection.
1 - 000 979 023 - .5mm power wire. Optional if you want to go to the fuse block instead of tapping power from another source.
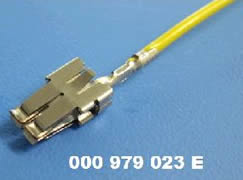
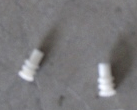
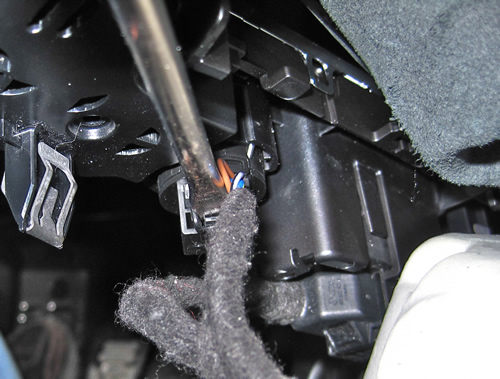
Now one of the reasons you come here. Details. One thing that every write or post out there is missing is this part right here. This is what you have to remove to get the wire into the plug:
The first picture is of the bungs removed from the ABS plug. The second is of a direct Audi part.
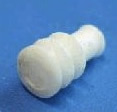
Now the Audi part measures
4.4 x 7.5. I don't have the measurements of the parts that come out of the plug but based on the colour code of white, this one looks like the match. The next size in white is 12mm.
Now when you put the new wires in the plug your going to be missing seals for those holes. I got lucky enough to have a spare ABS plug so I used the factory wires and seals.
Now based on the size the closest match I could find was 4.5 x 8.0. The inner diameter will take a wire up to 1mm. I think this is a close enough match to get you sealed up and water tight again. Just remember to put these on the lines BEFORE you add the extensions. You wouldn't want to get done and find out the seal can't be used because the pin is to big or something.

2 - Seals 1J0 972 741. Just note I've based the part on what I think matches the measurements.
Approx 20 feet of wire to extend the repair wires from Audi. You only need a .5mm wire for these.
Solder and Heat Shrink (if your going to extend the wires properly)
Friction tape (to cover the wires going to the ABS control unit)
Small zip ties (to help secure your line to the ABS unit.)
The Install
The first step is to get the MMI controls out. I will vary from the Bentley manual to make this easier for you to do this on your own and lower the risk of scratching any trim.
Start by releasing the shifter boot from the MMI controls. Although I have not performed this on an automatic the procedure is the same except put the transmission in the S position before you start with an automatic.
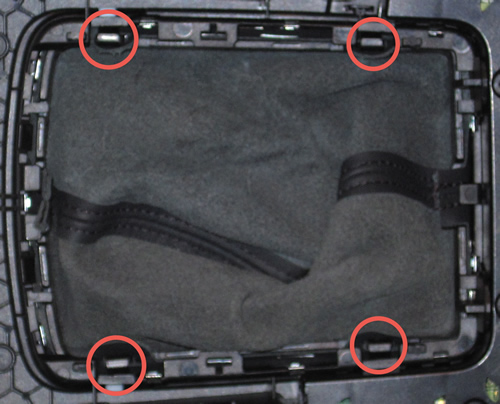
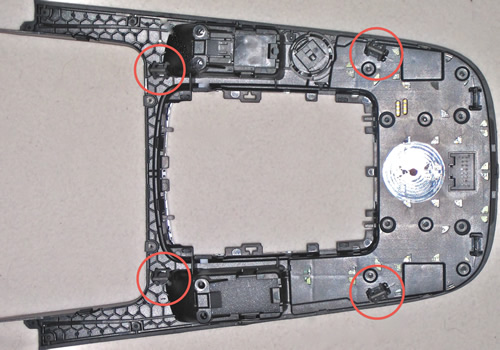
There are 4 clips holding the bottom of the boot to the MMI controls. The boot is tight and the clips just clip over the bottom of the controls to hold it in place. Your going to take your trim tool or equivalent and just pry the boot up and out on each side.
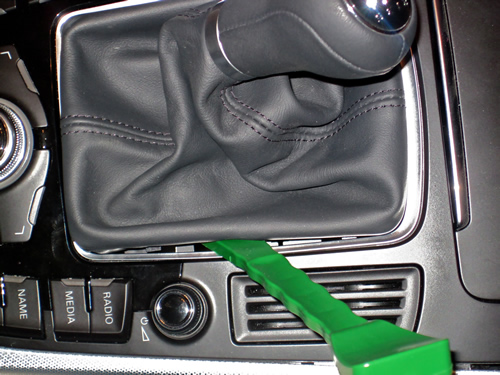
Here you can see the 4 clips you are releasing.
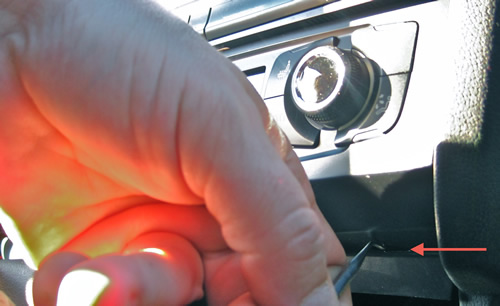
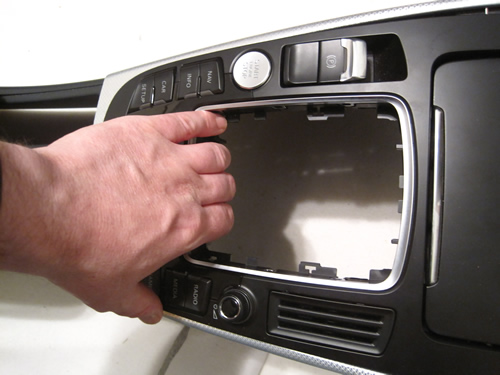
Pulling out the AC Controller. This is easier with a spare set of hands to hold it when you have it removed but you can do this procedure fairly easy on your own.
The AC controller has 3 holes on the bottom of it. Take a hook tool and place it one of the holes on the end and pull. It will pull out a bit then alternate to the other hole and pull (alternate until you have the unit pulled out). It holds in place with 4 pressure clips so it's not hard to pull out.
I apologize for the pictures but this should give you more than enough to remove the unit. I used a larger tool than what's shown. I simply used this one as an example.
Here you can see the holes in the bottom of the unit:
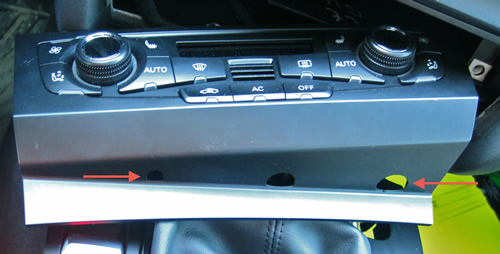
Here are the 4 clips that hold the unit in place:
And the dash where they clip in:
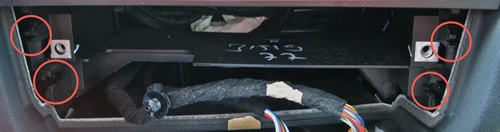
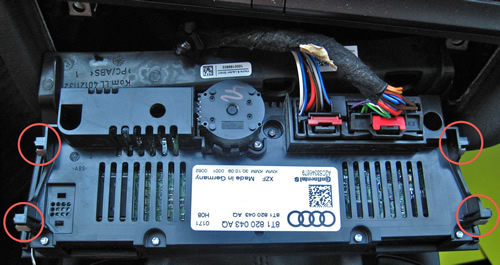
Once the AC unit is out put your hand under the back of the MMI controls and pull up. This will pull the clips out of the console. I always work with a quick and positive motion when I work with clips to prevent any undue stress to the unit. Do not pull up to far as there are a number of plugs to be undone and the one for the push start if equipped is fairly short.
Here you can see the 4 clips that hold the unit in place
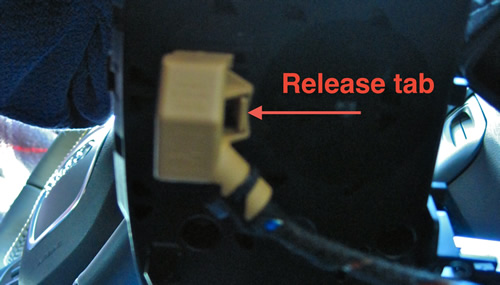
It helps to use a small screwdriver to push the release tabs down for the plugs. They will slide right out once the tabs are depressed.
The first plug you should release is the Start/Stop button. This harness is shorter than the others so you have to release it first which will allow you more room to work on the others.
Start Stop Button
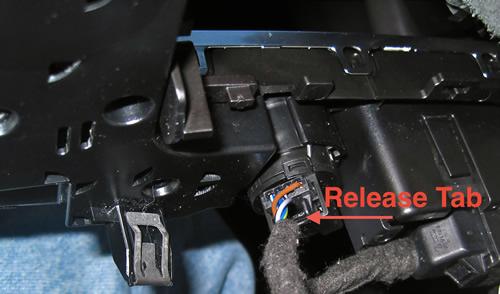
Slide a small screw driver in to depress the tab and just pull on the harness. That is the easiest way to release them.
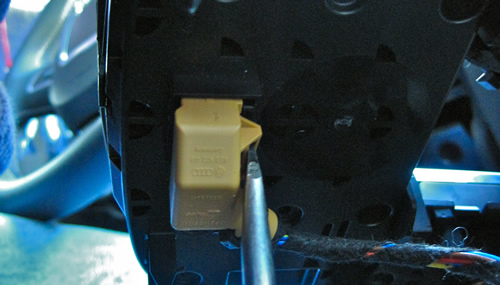
The MMI Plug
Release in the same manor:
Now if you are going to need to use the car prior to completing this mod you need to do a few things. Remove the emergency brake button and plug it back in and make sure you leave your MMI selected to radio so you have something to listen to. Other than that you can use the key in the dash if you have push start to start the car and you can drive without the controls in the car without any risk of problems.
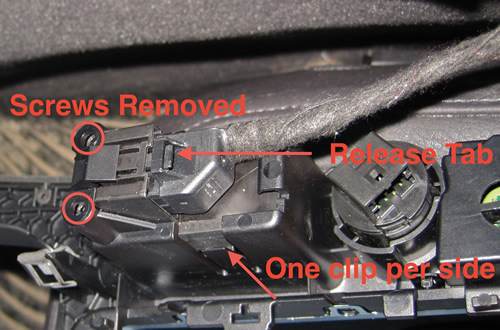
To remove the emergency brake button release the harness in the same manor then unscrew the two screws that hold the button in. You then release the clip on each side of the button and push it up through the top to remove it from the MMI surround.
Please note: AudiEnthusiast.com is in no way associated to Audi or VW in any way shape or form. All brand names and manufacturers listed here are for informational purposes only and are in no way endorsed by AudiEnthusiasts.com unless stated other wise.
WARNING!! All modifications and changes are done at your own risk. This site in no way approves the modifications performed here for your vehicle. Please check with your dealer before performing any changes as they may void portions of your factory warranty.