.: Audi Drive Select (ADS)
This is an optional step. For MMI users you have control through the Drive select menu, however for non MMI cars this will be the only way to change settings without using VCDS.
Page 4 Installing ADS Buttons continued:
The final step is to install the buttons. Now although the wiring is the same between MMI and Non MMI the buttons obviously do not install the same.
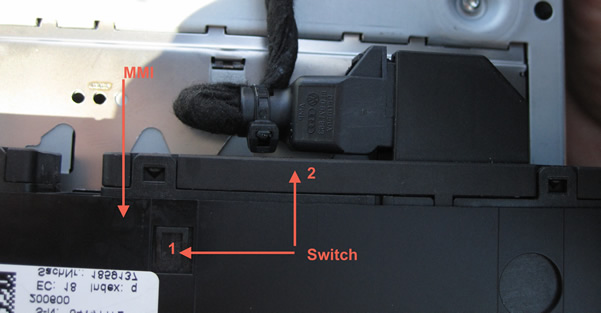
With the MMI removed per earlier instructions the buttons are removed by pushing them towards the back of the MMI. I found them to be very tight. You need to insert a small screwdriver to release the 2 clips per switch that hold them in place. In the picture you can see at position 1 where one of the clips is. Once you raise the plastic up you can push the switch out. Even with those clips released the buttons are still tight. You may have to use a bit of pressure to get them out.
Installation for non MMI.
Because this install requires a new console cover the install isn't to difficult. Insert your new buttons into the new console cover before you start.
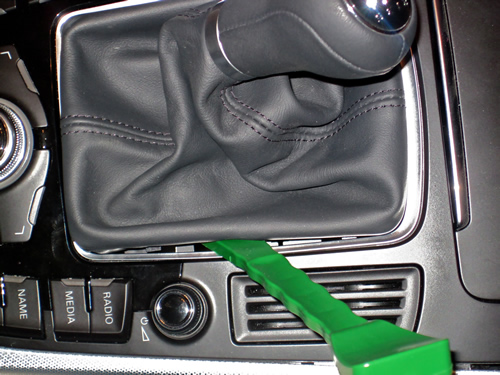
Start by releasing the shifter boot from the MMI controls. Although I have not performed this on an automatic the procedure is the same except put the transmission in the S position before you start with an automatic.
There are 4 clips holding the bottom of the boot to the MMI controls. The boot is tight and the clips just clip over the bottom of the controls to hold it in place. Your going to take your trim tool or equivalent and just pry the boot up and out on each side.
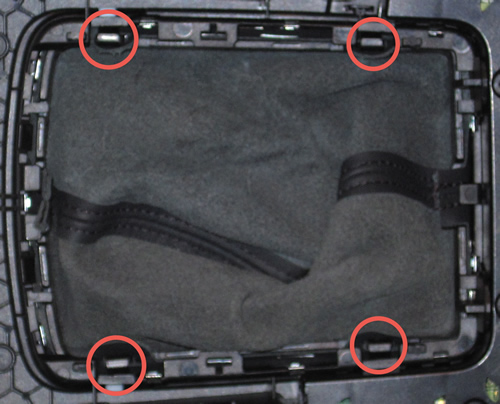
Here you can see the 4 clips you are releasing.
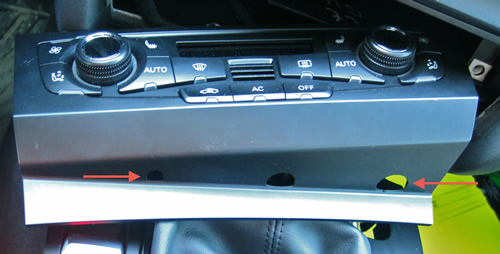
Pulling out the AC Controller.
The AC controller has 3 holes on the bottom of it. Take a hook tool and place it one of the holes on the end and pull. It will pull out a bit then alternate to the other hole and pull (alternate until you have the unit pulled out). It holds in place with 4 pressure clips so it's not hard to pull out.
I apologize for the pictures but this should give you more than enough to remove the unit. I used a larger tool than what's shown. I simply used this one as an example.
Here you can see the holes in the bottom of the unit:
Here are the 4 clips that hold the unit in place:
And the dash where they clip in:
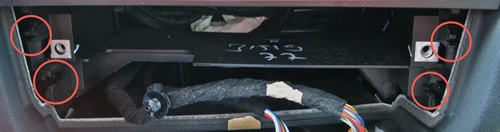
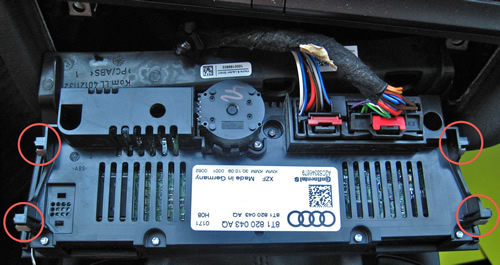
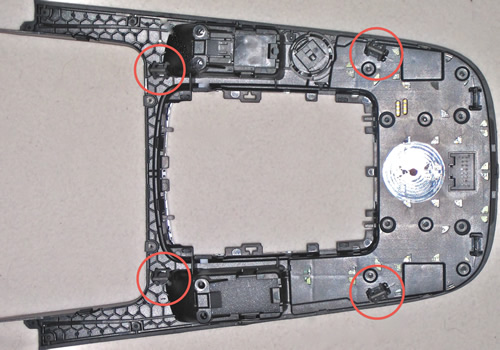
Once the AC unit is out put your hand under the back of the MMI controls and pull up. This will pull the clips out of the console. I always work with a quick and positive motion when I work with clips to prevent any undue stress to the unit. Do not pull up to far as there are a number of plugs to be undone and the one for the push start if equipped is fairly short. Although an MMI panel is shown the procedure is the same.
Here you can see the 4 clips that hold the unit in place
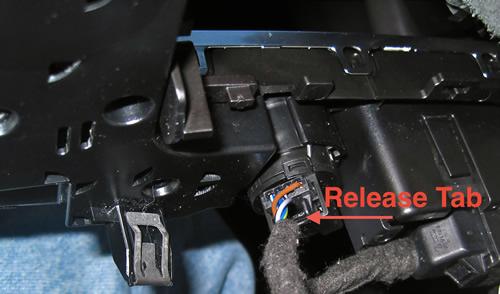
The first plug you should release is the Start/Stop button. This harness is shorter than the others so you have to release it first to allow more room to work. Slide a small screw driver in to depress the tab and just pull on the harness. That is the easiest way to release them.
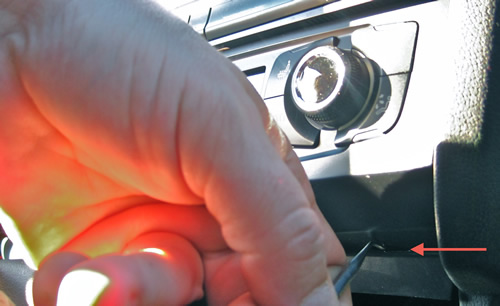
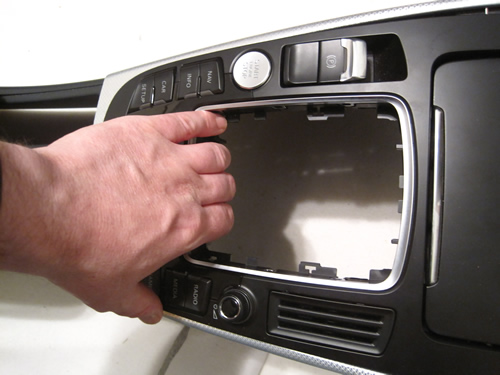
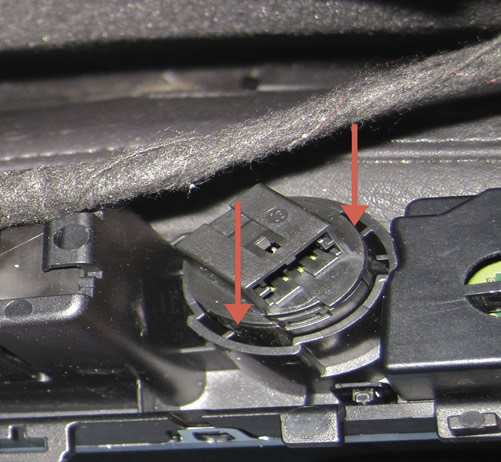
You will need to remove the start button to transfer to the new surround. It's held in place with two spring clips. In order to release the clips you have to slide something down each opening to push the clips in. Audi actually recommends sliding a 2mm diameter wire down each side. See the picture below for the openings where the clips are:
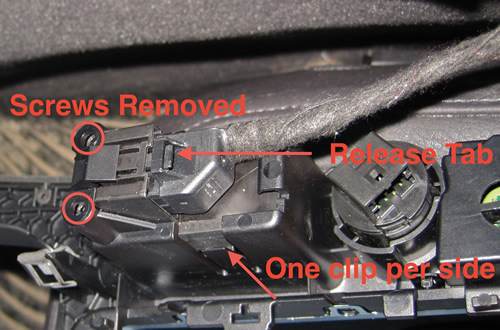
To remove the emergency brake button, release the harness then unscrew the two screws that hold the button in (if equipped). You then release the clip on each side of the button and push it up through the top to remove it from the surround.
I do not have a console to show the release of the ESP buttons. However there are 4 clips that hold the switch in place. They are on each corner of the switch. Use small screwdrivers to separate the clips from the panel and push the buttons out through the back. Install them in the new console along with any other switches you removed and reassemble the console.
Please note: AudiEnthusiast.com is in no way associated to Audi or VW in any way shape or form. All brand names and manufacturers listed here are for informational purposes only and are in no way endorsed by AudiEnthusiasts.com unless stated other wise.
WARNING!! All modifications and changes are done at your own risk. This site in no way approves the modifications performed here for your vehicle. Please check with your dealer before performing any changes as they may void portions of your factory warranty.