.: Audi Drive Select (ADS)
This has been covered in the forums to a fair extent so I thought it time to simplify the posts and provide information on installing ADS buttons as well. .
ADS is an option available that includes Dynamic Steering and Adjustable suspension. Of course enabling this feature won't magically enable these features for you but it will alter some driving conditions slightly. And for those with ADS already the coding will allow you to set a default setting for your ADS.
Its reported that with ADS enabled on non ADS cars you can feel a difference in the engine response when the engine is set to Dynamic and people are reporting better steering response once you get up to 20kph. I will cover the coding as well as installing ADS buttons in this project. You do not have to install the buttons as the settings can be controlled through the MMI if you have NAV but you will have an error in VCDS as the car is expecting to see the buttons installed.
Enable ADS and Default Settings - Page 2 Installing ADS Buttons
There are two stages to this, one is enabling the ADS and the second optional which is installing the ADS buttons.
Programming:
Cars with MMI can control individual setting through the MMI. Cars without need to make their individual setting directly in the adaptation coding of the control module. Of course the advantage of the MMI is that you can control the components when ever you want on an individual basis. One solution for the non MMI cars is to install the buttons which will allow you to change the settings on the fly but will not allow you individual control of the separate systems.
*Note that you will have an error after you complete this coding. Since the car is looking for an ADS switch you will get a Charisma error when performing a scan. This will not cause any errors on your dash. If you install the switches you will get rid of the errors.
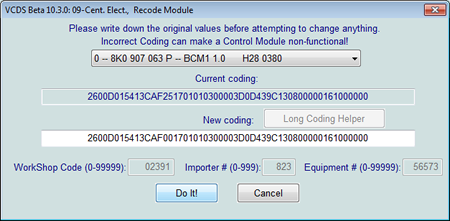
Long Coding must be done first to enable the ADS MMI menu and allows access to the adaptation coding:
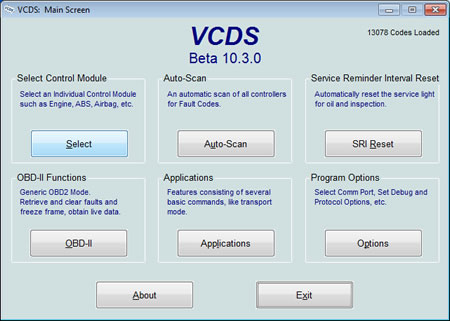
Choose the "Select Control Module " Option:
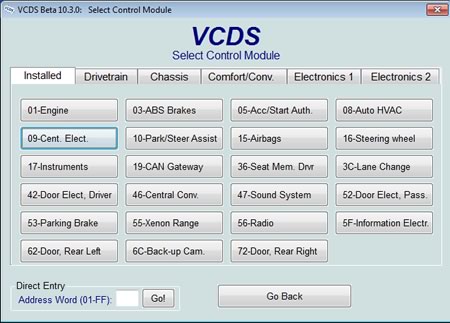
Choose Module 09:
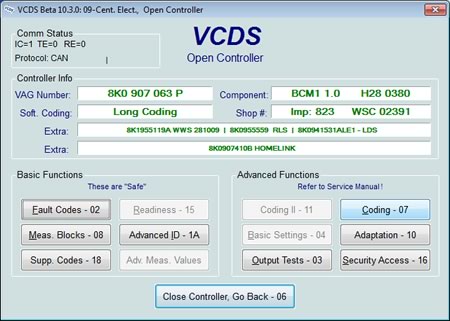
Select Coding:
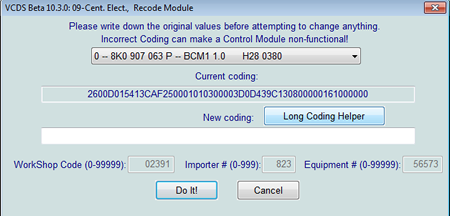
Select Long Coding Helper:
09-Central electric:
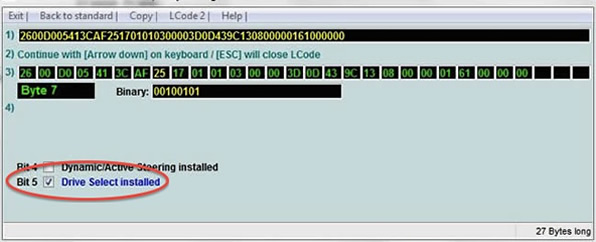
[Long Coding] Byte 7, bit 5, change 0 to 1 - (Tells the car Drive Select is installed)
The following enables the specific items in the MMI Menu as well as activating the feature. Some are for cars with the actual ADS hardware such as Sports Differential. Don't waste your time enabling items you don't have it wont do you any good and could cause errors.
Most people with Automatic transmissions are skipping bit 0 because of the car always in S mode, but they are still reporting good results for the other changes.
My recommendation is for Automatics to enable Bits 1,2 and 4. Some people claim results from 4 and others don't. It wont cause any issues to enable and try it.
For 6MT I would enable 0,1,2 and 4. No issues have raised from that coding.
This is what the coding looks like on my A4 6MT with no issues and good results.
09-Central electric:
[Long Coding] Byte 8
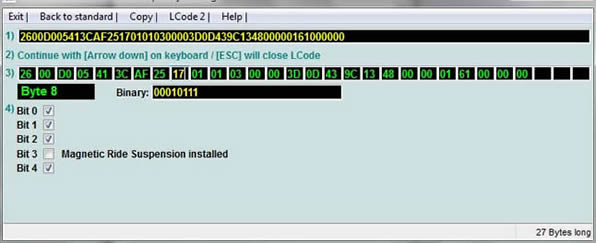
Byte 8 Bit 0 Change 0 to 1 - Enable Engine/Gearbox (This bit will also enable S mode even when D is selected For Autos- This bit was determined to be optional)
Byte 8 Bit 1 Change 0 to 1 - Enable Dynamic Steering (This bit enables steering response control)
Byte 8 Bit 2 Change 0 to 1 - Enable Engine (Reported for better throttle response)
Byte 8 Bit 4 Change 0 to 1 - Enable Steering (If equipped)
You will never need to enable the following unless you install the equipment. From Factory these will be enabled if the equipment is installed in your car.
Byte 8 Bit 3 Change 0 to 1 - Enable Suspension On MMI Menu (Magnetic Suspension)
Byte 8 Bit 5 Change 0 to 1 - Enable Sports Differential On MMI Menu (If equipped)
Enable what you need to and don't be afraid to alter your configuration.
09-Central electric:
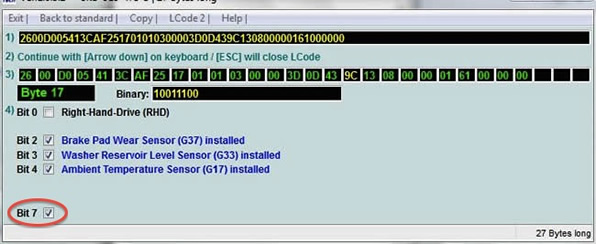
[Long Coding] Byte 17, bit 7, change 0 to 1 - (Enables MMI Display)
09-Central electric:
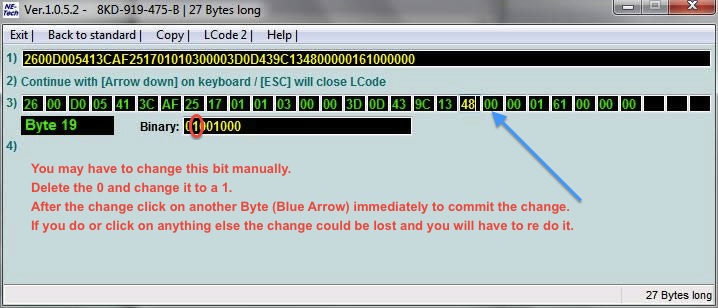
[Long Coding] Byte 19, Bit 6, change 0 to 1 - Enables proper light control for ADS switch if installed
Once you have complete making your coding changes click Exit on the top left which will return you to the long coding screen. Click "Do It!" and your coding will be saved.
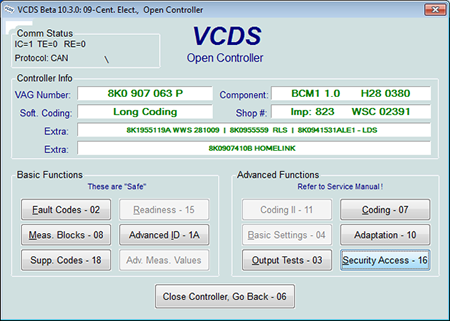
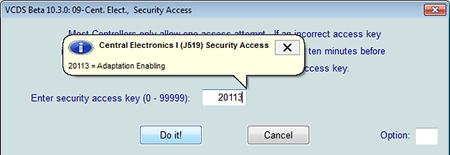
The next step is to enable Security Access for the Adaptation Coding. Click on Security Access.
Then Enter the security code that pops up and click "Do it!".
Adaptation:
The adaptation coding sets the default setting for the ADS system. This is useful for anyone that has ADS and doesn't want to have to change the setting every time they get in the car. By changing all of the settings to Individual the car will look to the MMI If equipped for what it should be set as. This allows you to set different settings for each component. If you have a Non MMI car you have to hard code your setting to something specific but can install the buttons if you want to change the settings without having to go back in with VCDS.
Now Click on Adaptation:
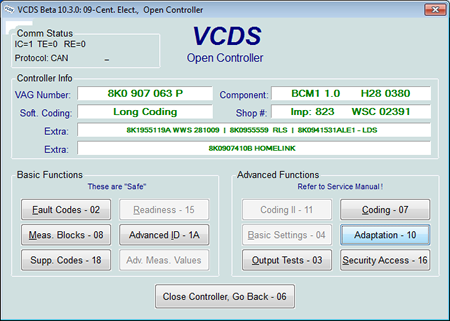
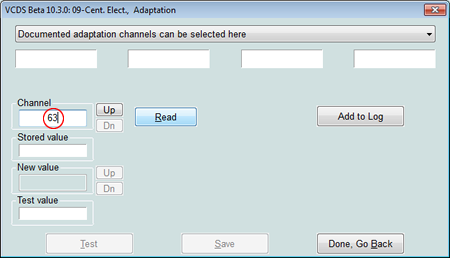
Once in adaptation click on the channel box and enter 63 then click "Read".
* Note:
If you do not have access to channel 63 then you either did not enter the security access or you did not complete the long coding properly. Go back and check those then return to the adaptation screen and try again.
What you set for the next 4 screens will be dependant on your project. If you have ADS already or have a non MMI car you will set the ADS to what ever you want the default settings to be. In most cases I am assuming you will want Dynamic and will be setting the value in the "New Value" field to 3. If you have an MMI car you will be setting this to 4 as you can alter the settings directly in the MMI. Enter your new value and click save.
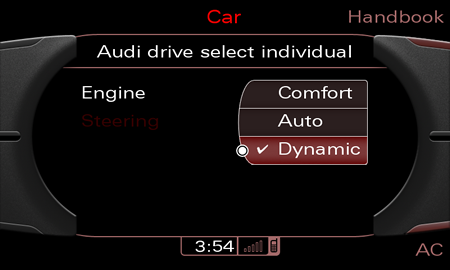
1 = Comfort
2 = Auto (Factory default)
3 = Dynamic
4 = Individual
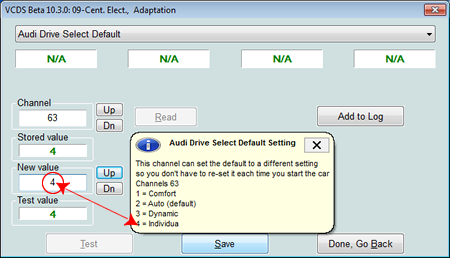
*Complete the above step for Channels 63,64,65 and 66.
For MMI Cars Only.
It's not known how to enable the menu via VCDS yet so instructions are provided for enabling through the hidden menu. If you have not enabled the hidden menu yet go here
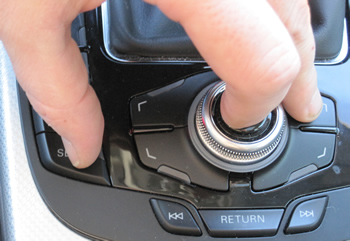
To get into the hidden menu in the MMI hold down the Car and Setup button for approx 6 seconds and the menu should appear on the screen.

If you can't enter the menu after a few attempts re-do the MMI Menu coding EVEN if the coding is correct. Change it to 0 and save then change it to 1 again. I've had to do this from time to time for no apparent reason.
Once the menu comes up scroll to Car and select it by pushing down on the scroll wheel.
Scroll to “carmenuoperation” and select with the scroll wheel.
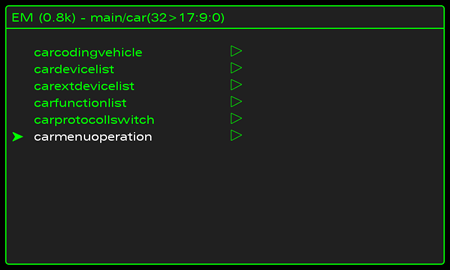
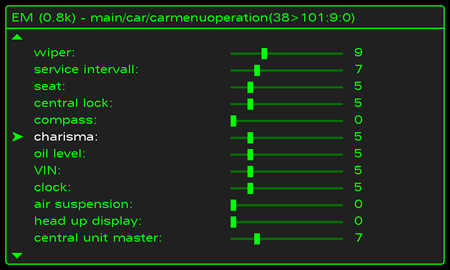
Scroll to Charisma and select it with the scroll wheel.
It will be set to 0 you will change it to 1 or 5 then push the scroll wheel to set it.
1 allows access while your not moving 5 allows access at all times.
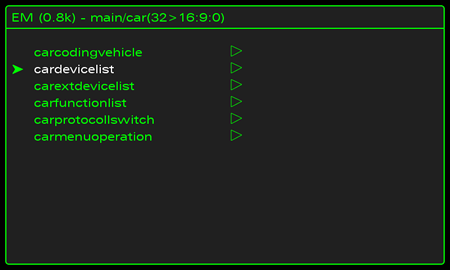
Push the return button which will take you to the previous menu. Now select “cardevicelist”.
Scroll to “Charisma” and push to select. The box should go from empty to filled in.
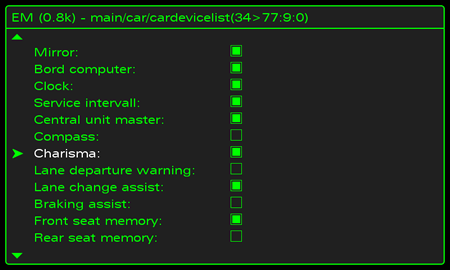
Press return to go back.
Now reset the MMI. This is done by pushing down the Setup – Scroll Wheel and top right menu buttons at the same time.
Once the MMI has reset, click on the car button and go to “Audi drive select.." menu.

Your menu may look different depending on options enabled.
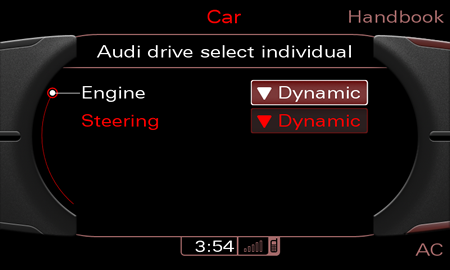
Once selected choose the appropriate setting for yourself.
Please note: AudiEnthusiast.com is in no way associated to Audi or VW in any way shape or form. All brand names and manufacturers listed here are for informational purposes only and are in no way endorsed by AudiEnthusiasts.com unless stated other wise.
WARNING!! All modifications and changes are done at your own risk. This site in no way approves the modifications performed here for your vehicle. Please check with your dealer before performing any changes as they may void portions of your factory warranty.