.: Audi Drive Select (ADS)
This is an optional step. For MMI users you have control through the Drive select menu, however for non MMI cars this will be the only way to change settings without using VCDS.
Page 2 Installing ADS Buttons
Tools:
Radio Removal Tools (MMI Units Only)
8mm Socket
Soldering Iron
Heat Gun
Trim removal tool (non MMI cars only)
Parts:
Switches MMI High
The switches you need will be based on what other options you have or will be installing in your car. The default location for the ESP switch is on the left on LHD drive cars and on the right on RHD cars. Since this is the default location for your ESP switch proper factory install requires you to move the current switch to the opposite side it's installed in now. You can not reuse your ESP switch as they are shaped differently for left and right. There is the however part. If you want to save some money, simply order the ADS switch for the opposite market. So if you have a RHD car order the LHD switch and if you have a LHD car order the RHD switch. This will allow you to install the switch in the current unused mounting section and retain your ESP switch. Your install will not be 100% market specific but will save you money. Since I was installing the rear window blind and the front parking sensors I needed all new switches anyway's so I bought the proper ones.
ADS switch:
8K1 959 673 E V10 (LHD)
8K2 959 674 E V10 (RHD)
Then you need to choose your new ESP Switch:
LHD cars up to 06/10
ESP Only Switch:
8K2 959 674
ESP and Parking:
8K2 959 674 A
ESP and Blind:
8K2 959 674 B
ESP, Parking and Blind:
8K2 959 674 C
LHD After 06/10
ESP Only Switch:
8K2 959 674 F V10
ESP and Parking:
8K2 959 674 G V10
ESP and Blind:
8K2 959 674 H V10
ESP, Parking and Blind:
8K2 959 674 J V10
RHD Cars up to 06/10:
ESP Only Switch:
8K1 959 673
ESP and Parking:
8K1 959 673 A
ESP and Blind:
8K1 959 673 B
ESP, Parking and Blind:
8K1 959 673 C
RHD Cars After 06/10:
ESP Only Switch:
8K1 959 673 F V10
ESP and Parking:
8K1 959 673 G V10
ESP and Blind:
8K1 959 673 H V10
ESP, Parking and Blind:
8K1 959 673 J V10
Switches MMI Low (Symphony/Concert)
Since there is no hole for the ADS switch you will need to replace the plastic console piece that holds the buttons.
ADS switch:
8K0 959 673 E V10
Console Surround:
8K0 864 261 B V10 (Without advanced Key)
8K0 864 261 C V10 (With advanced Key)
Wiring
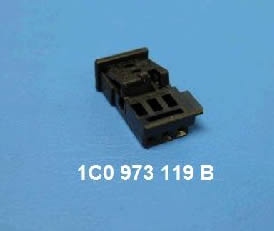
3 Pin plug 1C0 973 119 B
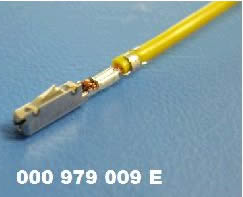
2 - 000 979 009 E repair wires for switch. You need 3 in total and each wire has 2 ends.
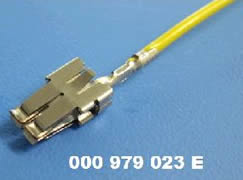
1 - 000 979 023 - .5mm power wire. Optional if you want to go to the fuse block instead of tapping power from another source.
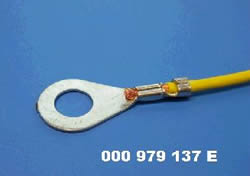
1 - 000 979 137 E - 1mm Ground wire if you aren't tapping into another.
*More than one method can be used for the wiring of the ADS switches. Some vehicles from factory go through intermediate connectors and some go directly to the control modules, splice points or fuse block. You will need to choose the method that suites you. In pretty well all cases it is faster and cheaper to go direct but I will show the method for my specific car and how it would have come from factory. All the wiring can be done with splicing. Once again the choice is yours but I will show the more detailed and factory method. I do not have pictures of the non MMI install. However it is almost identical. The only difference is you are replacing the console piece instead of the MMI piece.
Insert Radio Removal Tools and pull out the Head Unit until you can gain access to the rear connectors:

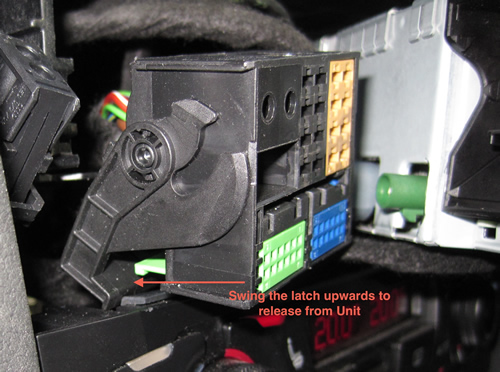
Remove Fibre Optic Connector:
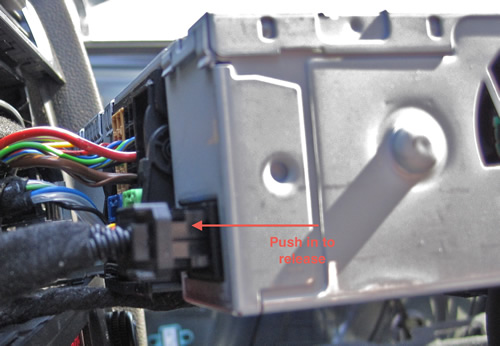
Remove Main Wiring Harness:
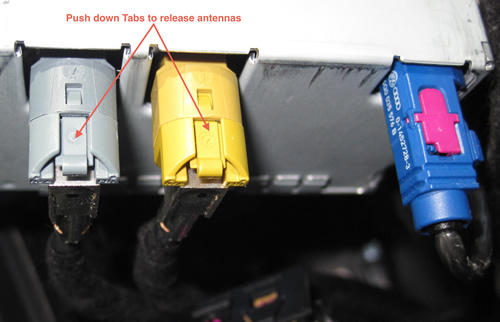
Remove Coax Plugs:
Remove Current ESP Switch
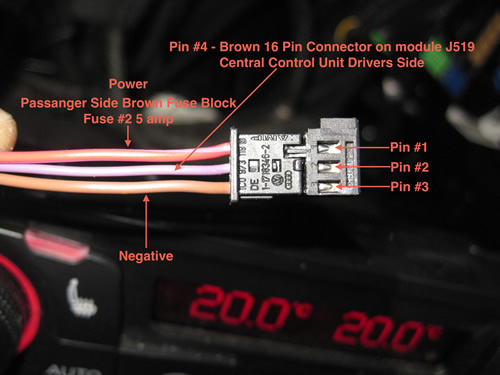
Now for the quick outline of where our three wires are going:
To complete the power wire to the factory location you will need to remove the passengers kick panel. You can of course cheat and tap those on the drivers side to save yourself some time but I do things the same way the factory does it.
Now this step is optional. On my car the power wire for the switch was designed to go through a plug. You can skip this and go direct to the fuse box if you wanted. Since I had the factory harness with proper ends I am installing mine as factory.
If you want to go direct to the fuse block and skip this step click here: Skip to Fuse Block
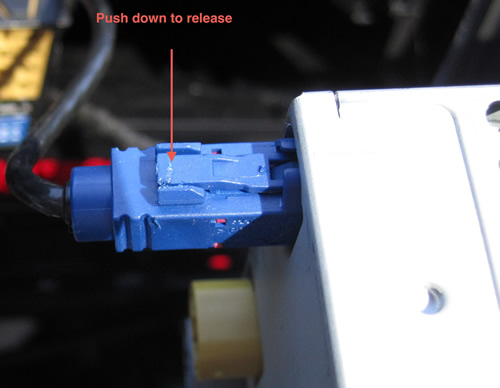
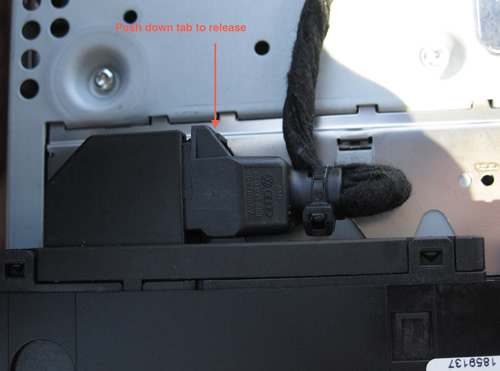
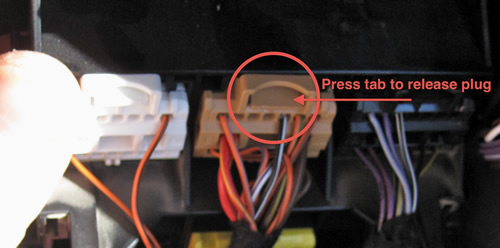
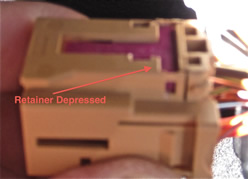
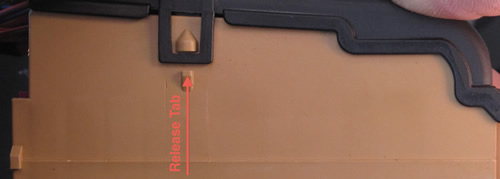
The first step is to insert the power wire from the switch into the first plug. Simply push down on the release tab and pull the plug out. You can see in the picture below where the fuse wire goes.
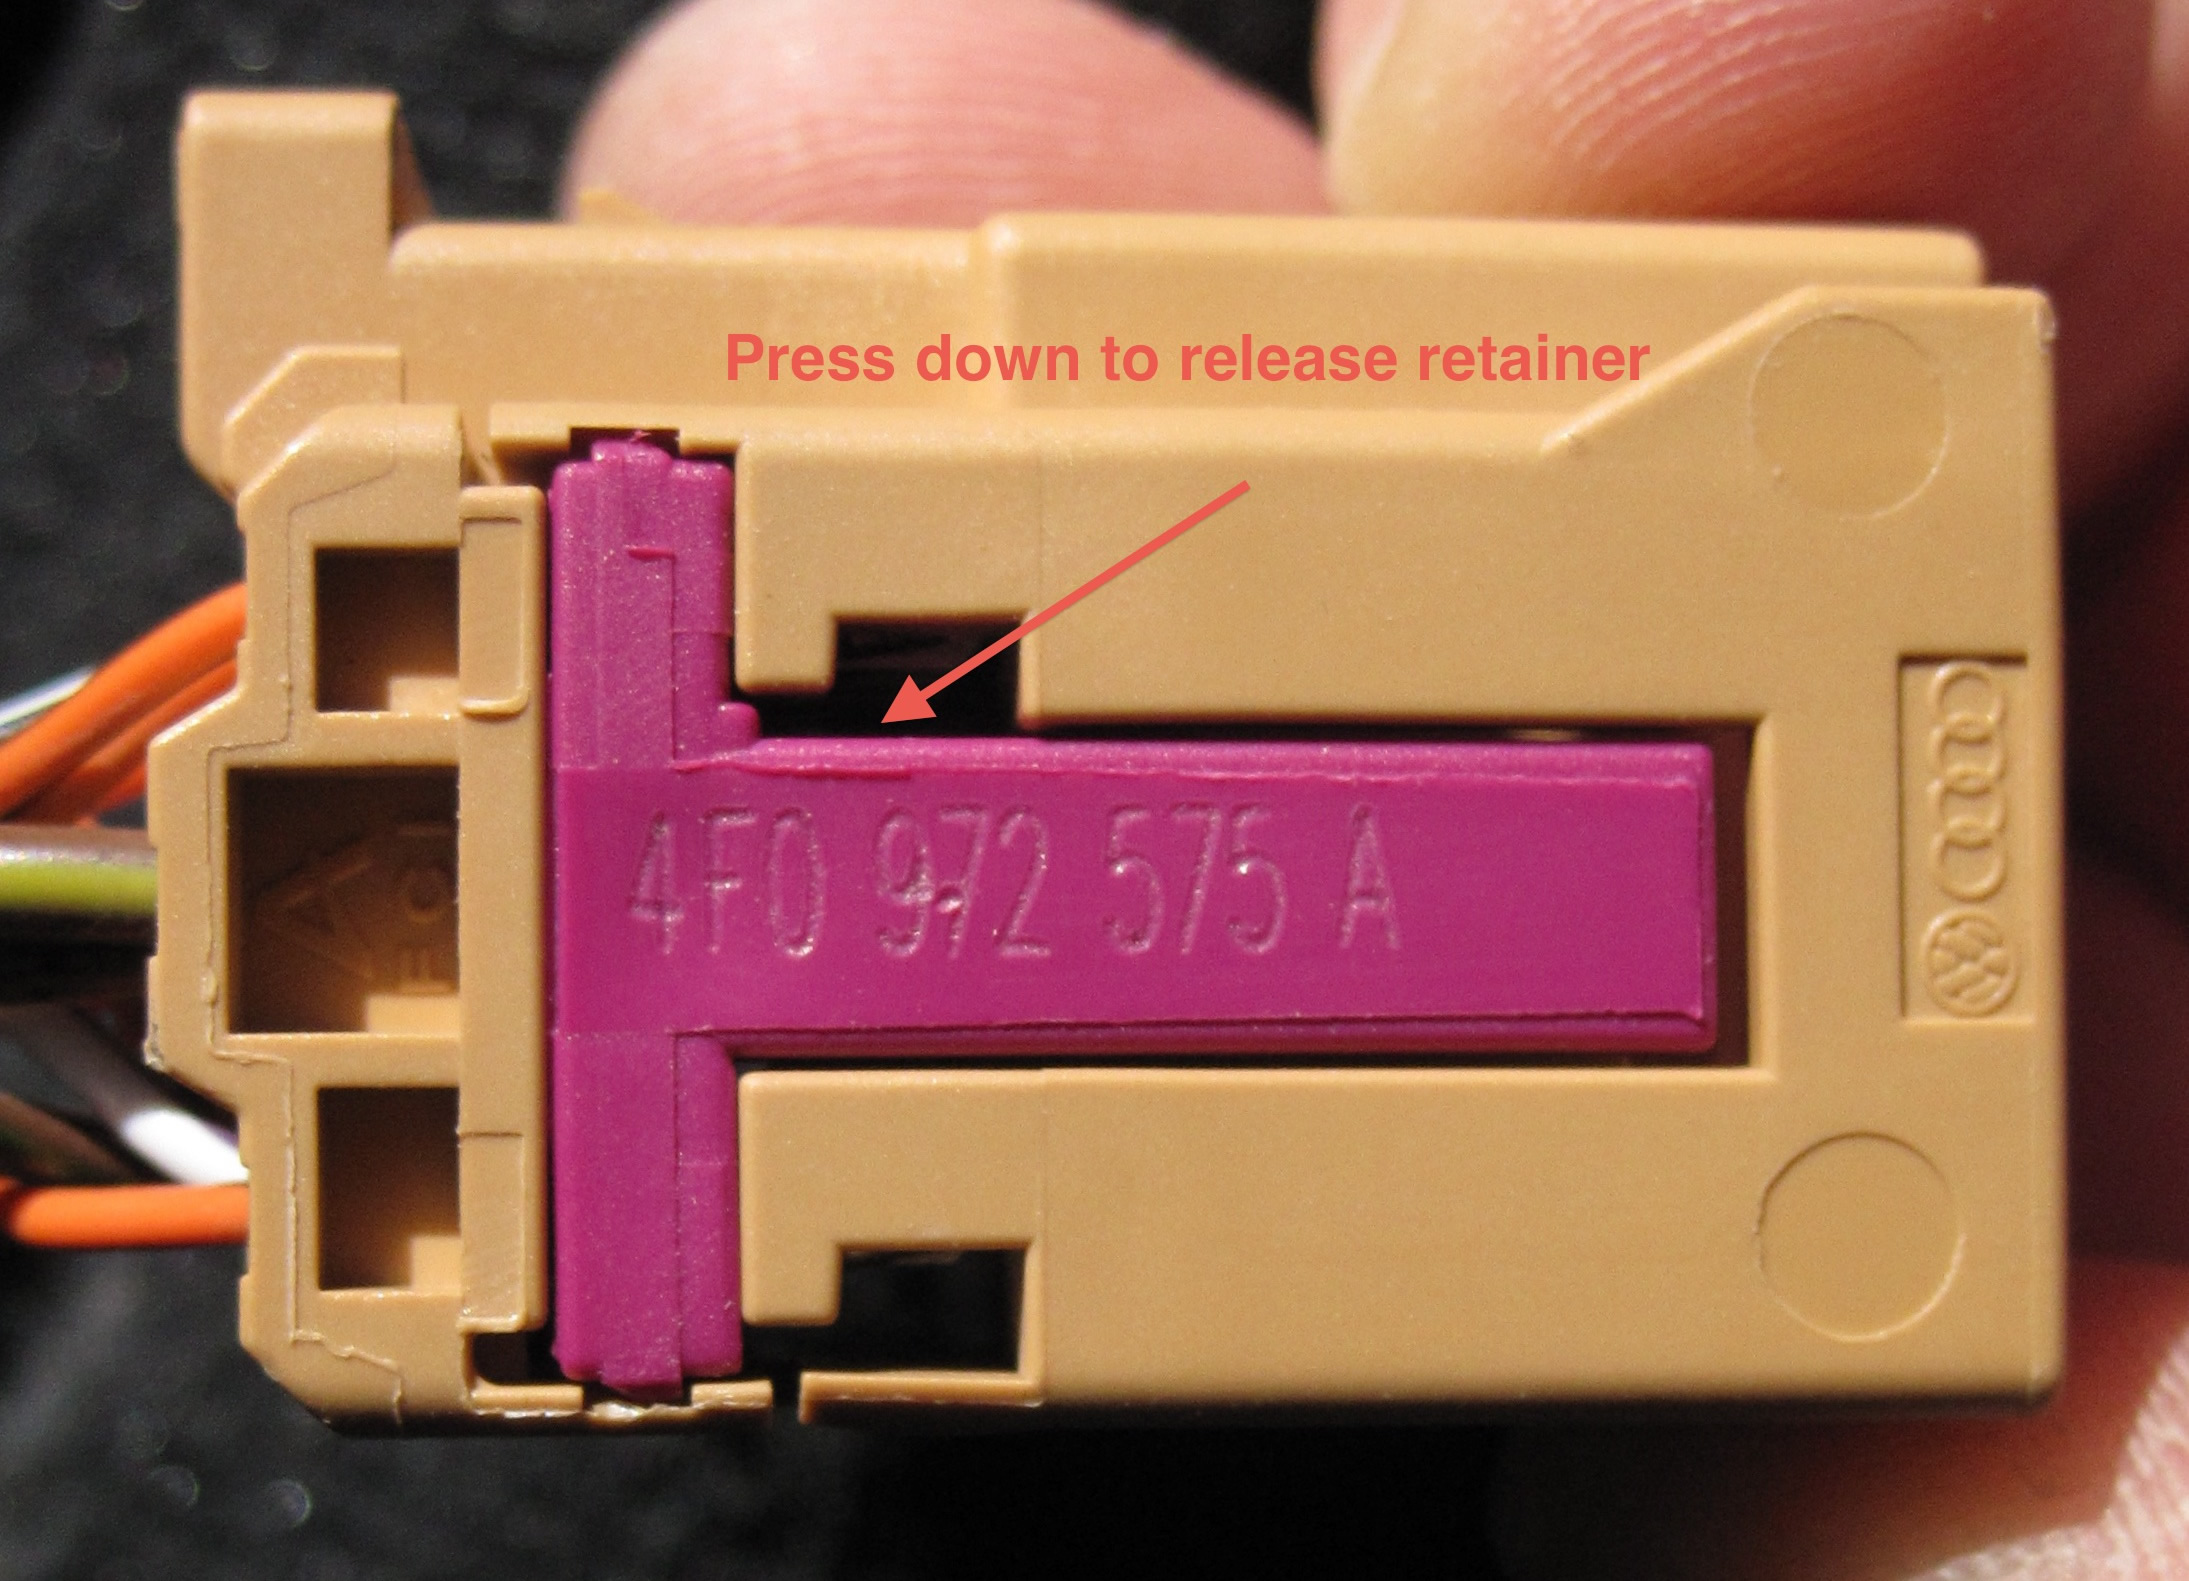
Once you have the plug out push in the wire retainer so you can insert the new wire.
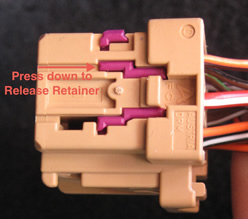
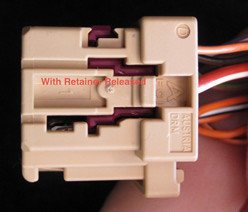
Make note of the position of the retainer. If you push it to far you will prevent the wire from being able to insert into it's slot.
Now just insert your wire into the plug and move on to side 2.
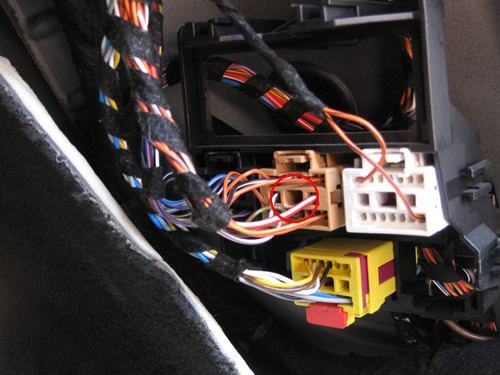
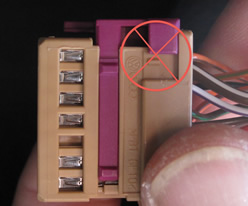
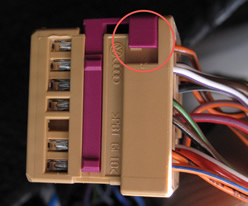
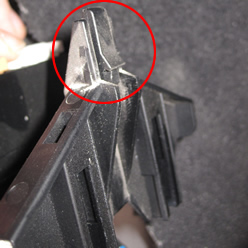
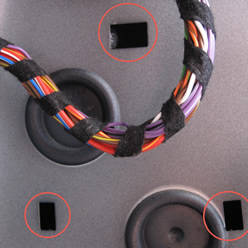
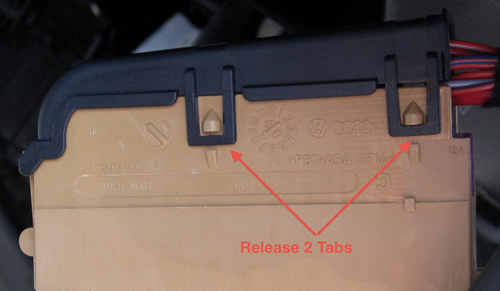
In order to get to the next plug you have to release the Black retainer plate from the car. There are three clips you have to release as shown in the pictures below.
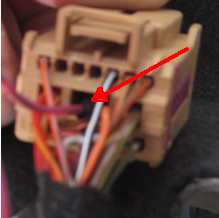
Now release the plug and prepare to insert the new wire.
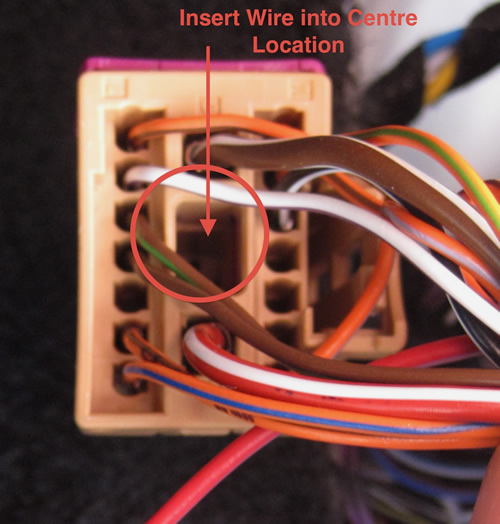
As you can see the retainer is slightly different than the first one.
Insert your wire and move on to the fuse block.
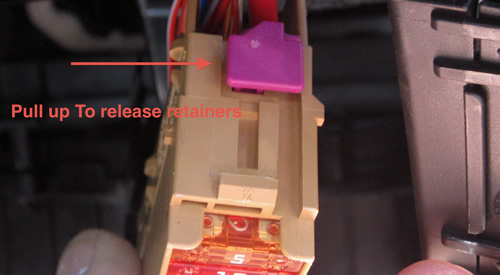
Release the brown fuse block from the passenger side holder.
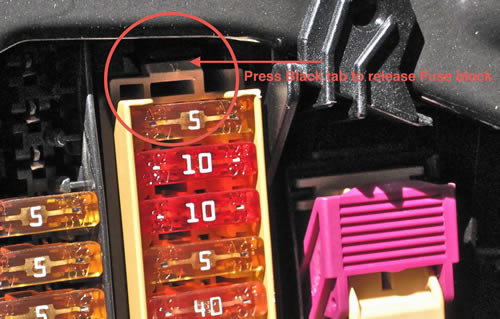
Once you swing the block out you will need to release the 4 tabs holding it in place.
Now pull out the pink retainer that you can insert your new power wire.
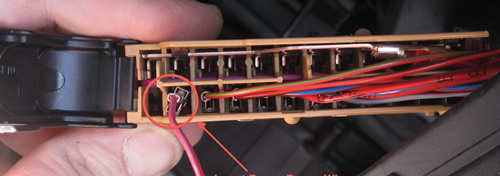
Fuse 2 will be the second from the bottom. insert your wire and your finished on the passengers side of the car. Reverse the procedure to the block back in place and don't forget to check your wiring routing and tape or secure the wire in which ever fashion works best for you.
Now onto the control module (9)
Please note: AudiEnthusiast.com is in no way associated to Audi or VW in any way shape or form. All brand names and manufacturers listed here are for informational purposes only and are in no way endorsed by AudiEnthusiasts.com unless stated other wise.
WARNING!! All modifications and changes are done at your own risk. This site in no way approves the modifications performed here for your vehicle. Please check with your dealer before performing any changes as they may void portions of your factory warranty.