.: Auxiliary Ventilation
This has been getting some attention so I thought I would add it to the collection.
The premise on this one is to allow you to activate the auxiliary ventilation and heating controls that would normally be used in the optional heater available in certain countries. Obviously this will not allow you to heat your car beyond the residual heat of the heater core.
Although I have read that changing an adaptation will remove the error created from this mod I could not make it work. The error is in a scan only will not create a CEL light so you don't have to avoid this mod for that reason.
Completing this coding will allow you to leave your blower motor running for your ventilation and circulate the air through your car. You can either set it to continue running when you leave the car or set multiple timers to start up on given dates and times. May be helpful for those that know when they are leaving work or want to keep the air circulating if your only going to be leaving the car for an hour or so.
So lets get to it. I'll explain the coding and functionality throughout the DIY.
*Note: If you do not currently have the AC menu buttom on the lower right when you go to the car menu this will most likely not work. The 3G MMI the menu can be enabled in the hidden menu. Once we get some people to test we'll see if we can enable the menu and get this working.
.: The Coding
<*When using long coding for MMI Menus you may have to reset the MMI or restart the car to get changes to take effect.
Enable non NAV Unit:
[56 - Radio]
[Coding - 07] -> Long Coding Helper -> Byte 8
Bit 2 change from 0 to 1
Enable MMI Menu 2G: *Not Confirmed Use hidden menu if needed.
[07 - Control Head]
[Adaptation - 10] -> Channel 11
add 64 to the existing value
Enable MMI Menu 3G:
There are two methods for doing this for the
[5F - Information Electr.]
[Coding - 07] -> Long Coding Helper -> Byte 6
Bit 1 change from 0 to 1
Step by step for 3G:
Using Hidden Menu:
To get into the hidden menu in the MMI hold down the Car and Setup button for approx 6 seconds and the menu should appear on the screen.
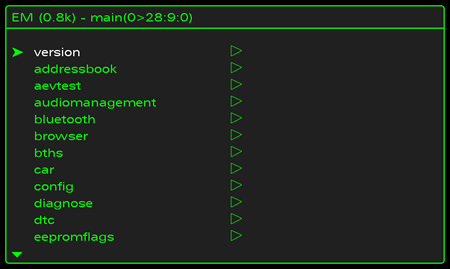
If you can't enter the menu after a few attempts re-do the MMI Menu coding EVEN if the coding is correct. Change it to 0 and save then change it to 1 again. I've had to do this from time to time for no apparent reason.
Once the menu comes up scroll to Car and select it by pushing down on the scroll wheel.
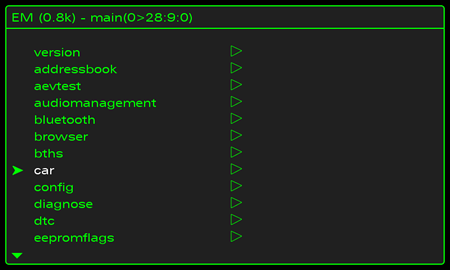
Scroll to “cardevicelist” and select with the scroll wheel.
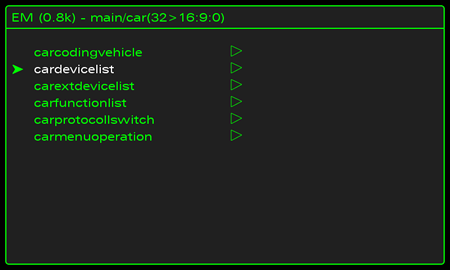
Scroll to "Auxiliary heating" and select, make sure the box is checked by pressing the MMI scroll wheel.
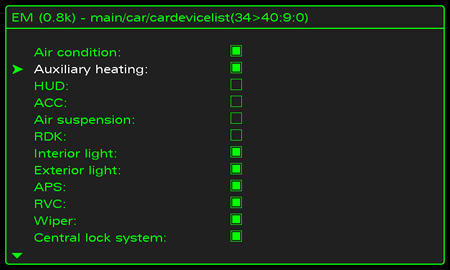
Press return to go back.
Now reset the MMI. This is done by pushing down the Setup – Scroll Wheel and top right menu buttons at the same time.
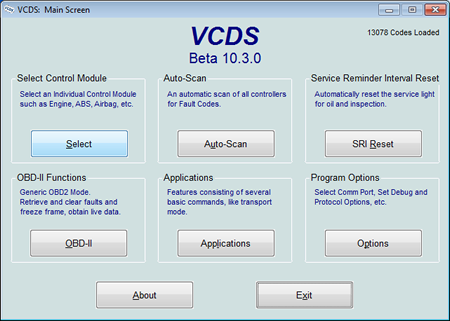
Launch VCDS and Click on the select button:
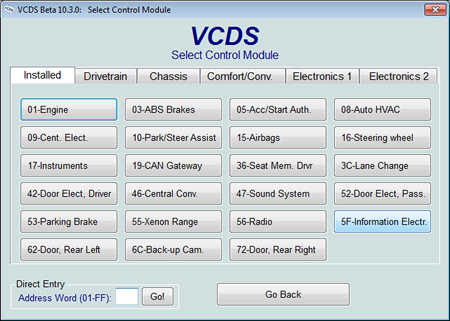
Choose 5F Information Electr.:
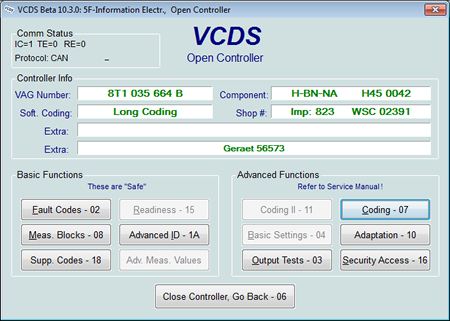
Select Coding - 07:
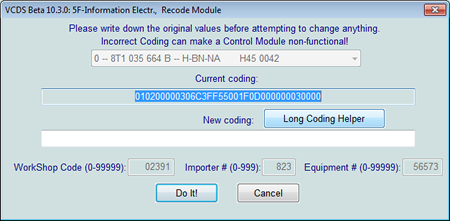
Click on the long Coding Helper button:
Go to Byte 6 and select Bit 1:
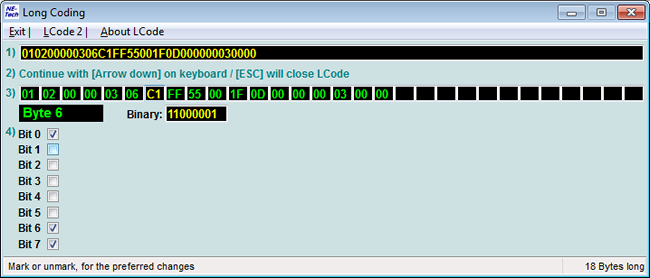
Once Selected click on Exit:
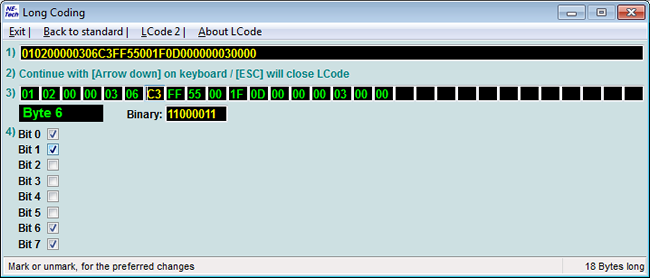
Once back to the long coding screen click the Do it! button. If there is no new coding then the selected box did not take. Go back and re-click it.
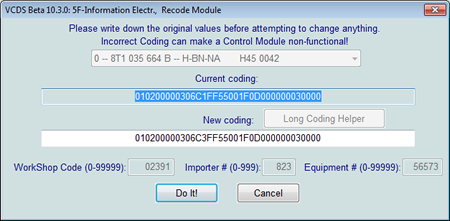
Go back to the main module menu and move onto the next set of coding.
[08 - Auto HVAC]
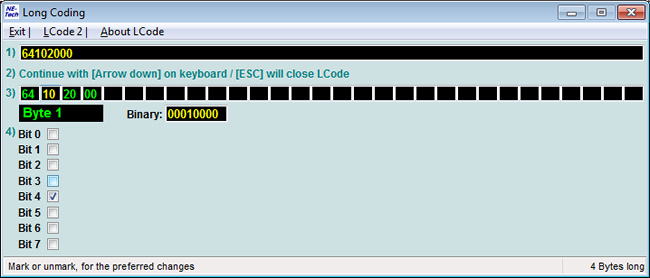
[Coding - 07] -> Long Coding Helper -> Byte 1
Bit 3 change from 0 to 1
If not already selected on the 3G menu also complete:
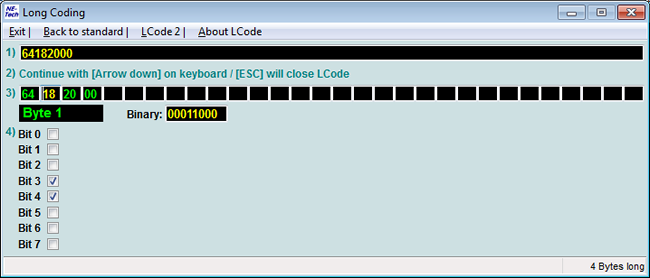
[Coding - 07] -> Long Coding Helper -> Byte 1
Bit 4 change from 0 to 1
Select 08-Auto HVAC:
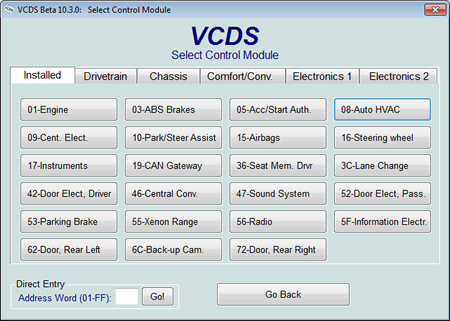
Select Coding 07:
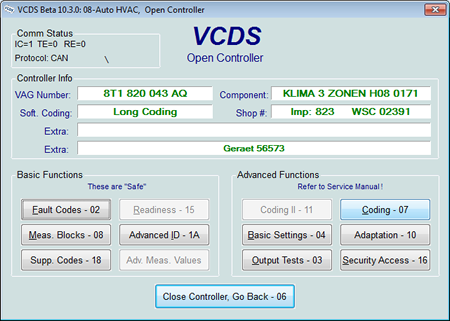
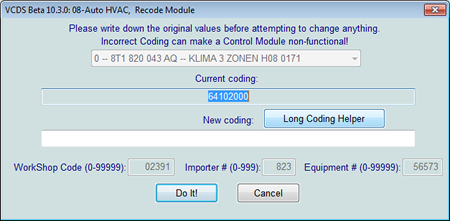
Click on Long Coding Helper:
Go to Byte 1 and check off bit 3. I'm unsure of the 2G but for the 3G you have to have bit 4 selected in order to control the heater controls on the MMI screen.
Once selected click on Exit to return to the long coding screen:
Click on Do it! after you confirm there is new coding. If no new coding is shown go back and confirm the boxes where checked.
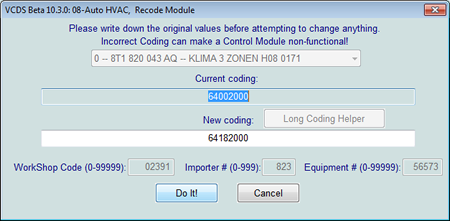
As mentioned previously it was claimed making this adaptation change would prevent the coding error on this module. It did not work on mine but I will provide it just in case it works for you.
[08 - Auto HVAC]
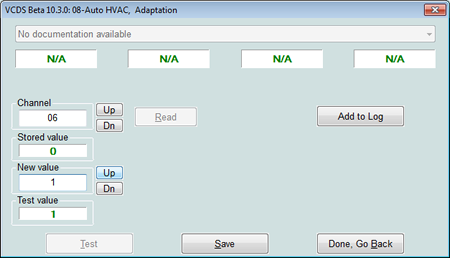
[Adaptation - 10] -> Channel 6 change 0 to 1
Choose Adaptation 10 (no security required):
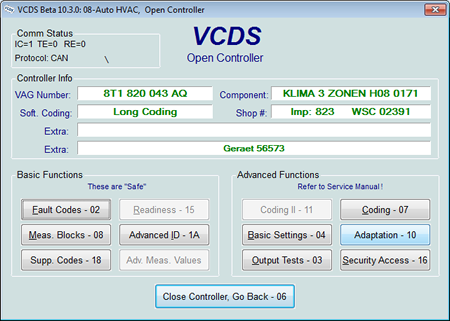
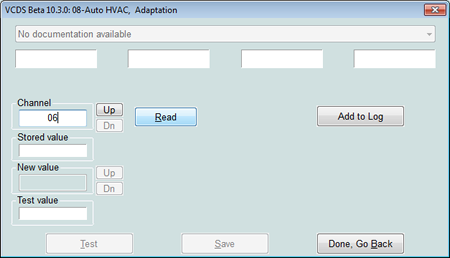
Enter 06 in the Channel field and press Read:
Enter 1 in the New Value box and press Test:
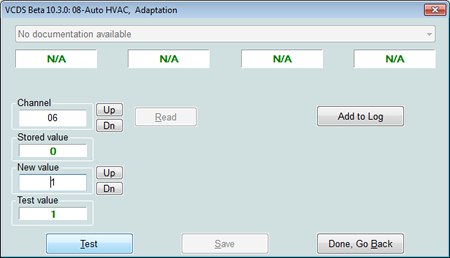
Press save to commit the new value and click OK on the pop up that will show once you do:
You can now exit VCDS.
That completes the coding and activation of the Aux Ventilation feature. Move onto the next page to see how to use it.
Please note: AudiEnthusiast.com is in no way associated to Audi or VW in any way shape or form. All brand names and manufacturers listed here are for informational purposes only and are in no way endorsed by AudiEnthusiasts.com unless stated other wise.
WARNING!! All modifications and changes are done at your own risk. This site in no way approves the modifications performed here for your vehicle. Please check with your dealer before performing any changes as they may void portions of your factory warranty.