.: Electric Folding Mirrors Cont.
We'll continue on here with preparing the mirrors the to re-install into the car. You will be swapping the mirror and your housing to the new units. Take your time as they can be stiff and tight. My understanding is the 2009's are easier to disassemble. Looking at the 09's they look very similar with 2 less clips and the front edge looks like it release much easier. So follow the basics here for the 2010's and I'm sure you'll do all right.
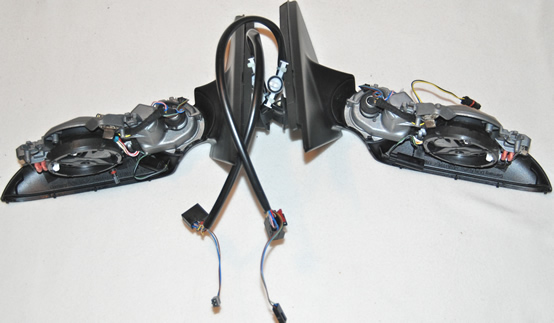
Parts:
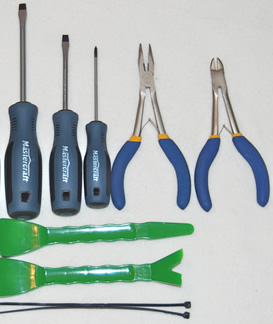
Tools:
Small Phillips screwdriver
Small Slot Screwdriver
Medium Slot Screwdriver
Wire Cutters
Trim Wedge Tools or Equivalent (optional)
Supplies
2x Small Tye Wraps
The Install:
The left and ride side are the same for disassembly and reassembly.
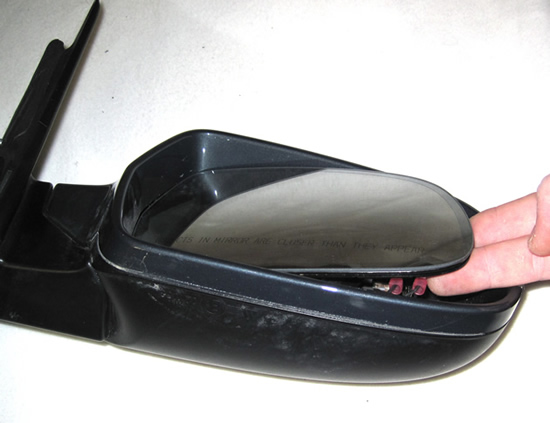
The first step is to remove the mirror (glass) from the housing. It's best if you have set the mirror all the way in before removing them but but pushing on the glass to get the correct position wont hurt the assembly. The reason you want to tilt the mirror all the way in is to make it easier to get your fingers behind it.
You should always be careful when working on anything with glass but this is actually very easy to do and the glass comes out with out much effort.
Once you have the glass tilted place your fingers under the glass and pull up. It helps to lift on the open side while bracing the closed side. It will not take much pressure to pop to glass out.
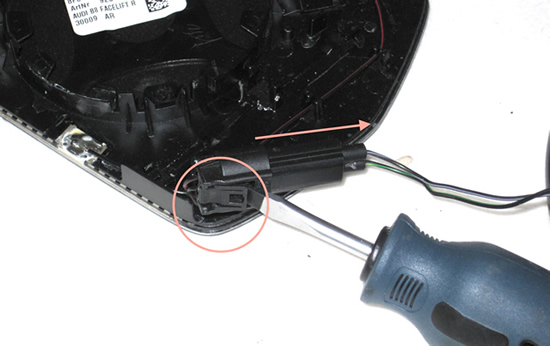
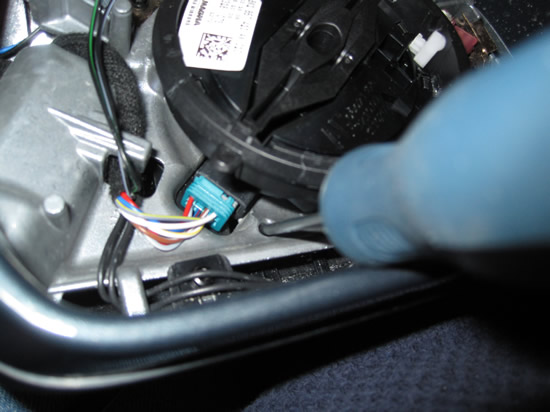
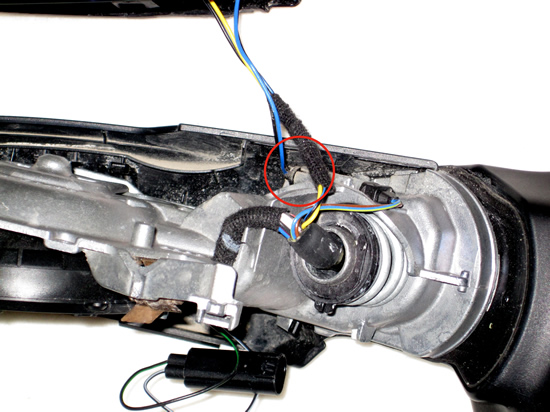
Once you have the glass released you will have to remove the heated and dimming wires. Below you can see the plugs that have to be release for the heated portion of the mirror. Read the notes on the next picture before proceeding.
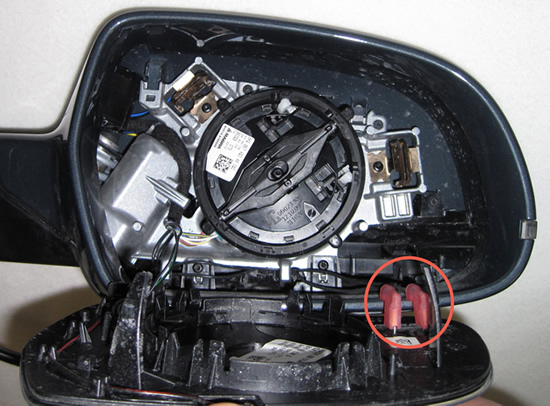
Looking at the blue lines you will see where the plugs from above reside. I recommend that you put one finger on the black dot that is beside each plug as this is there the tab connects to. If you pull up to hard you could damage the element and these plugs can be tight. The plug to the right is the plug for the dimming option. You will see the removal process in the next picture.

To release the plug for the dimming simply pry the release tab up slightly and pull the plug out.
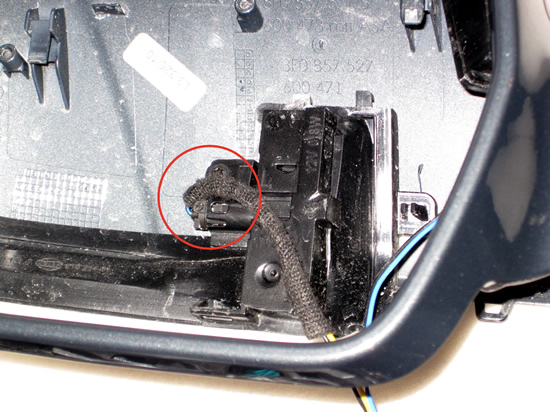
The final step is to remove the mirror cover so it can be placed on to the new mirror. From the picture below you can see the two phillips screws that have to be removed and the blue circles and line represent the clips that have to be released. The arrow points to a hole that cant be seen but you have to push a small screwdriver or something similar through the hole to release the tab.

Since your probably from this world and don't have 5 hands I came up with a way to keep the tabs out of the way while you try and get the cover off. Now just so you know on both my mirrors the tab next to the right top screw broke. Even without trying to force it. I just think this is a weak part on the mirror. Don't panic if yours break this mirror is put together so tight you wouldn't notice if half of them broke.
What I did was take a tye wrap and slide it down in the hole and block the tab from locking in place.
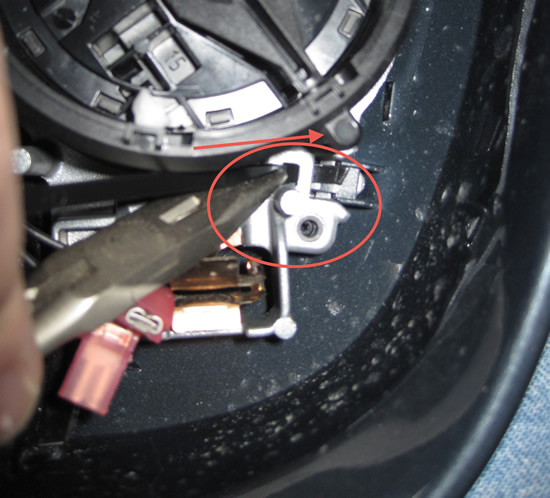
Once you have the tye wrap in place cut it off so there is enough left that it wont just pull out by accident as you try and remove the cover. Now repeat this for the rest of the tabs.
You will notice the bottom right tab has 2 pieces of the tye wrap because of the width of the tab.
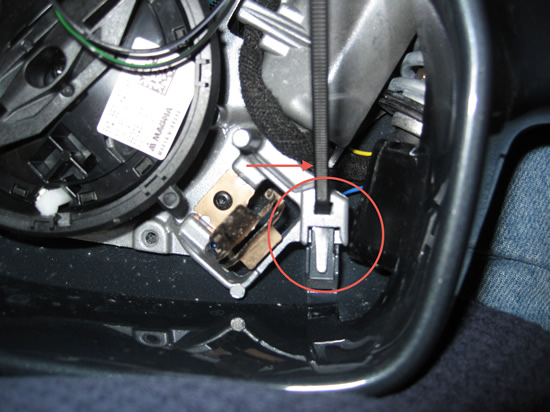
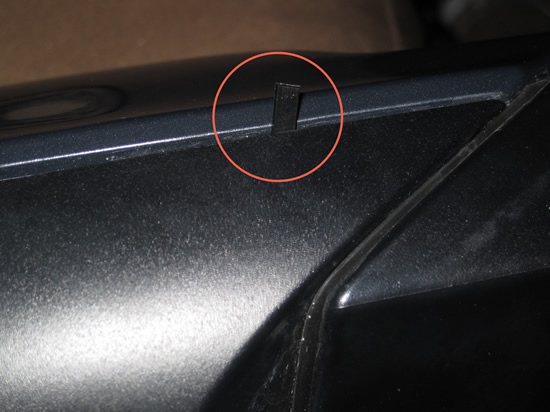
Here is a better look at the hole the leads to the tab behind the motor.
The first step to getting the cover off is to pry the bottom off and over the tabs its locked around. This will take a bit of pressure but it will slide over the edge. Once you have that done move to the back of the mirror.
There is one more tab hidden in the back of the mirror near the mount. You can use your new mirror for reference but as you can see here I pried the cover apart a bit and slipped a tye wrap down to help release it.
The next step is to pull and work the cover straight up. It took me up to 20-30mins each cover to get them off. Inspect the mirror closely before starting and it will help you understand all the little pegs and catches you have to work around.
Using a trim tool or something similar between the edges to pry the cover away from the assembly is the best way to get it started. You will have to work at this, it wont just pull apart. Not to worry a bit of force will not hurt it but be careful non the less. It will also help to pry the mirror apart at the main mount as well working your way around the mirror. The mirror actually clips together as well as the tabs to make things a bit more interesting. Most of the clipping is around the turn signal though and it's nothing that you have to do anything specific with just pull apart. Apparently the 2009's aren't as difficult in this respect.
Once the cover releases you will still have to work it off the assembly. No hints or pictures here it's like a little puzzle of fitting the big assembly through a narrow opening. Just work it around you'll get it.
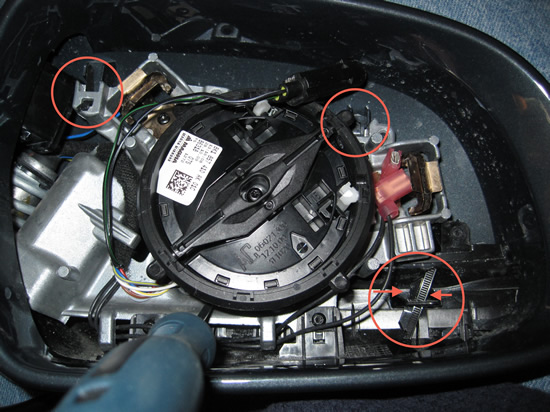
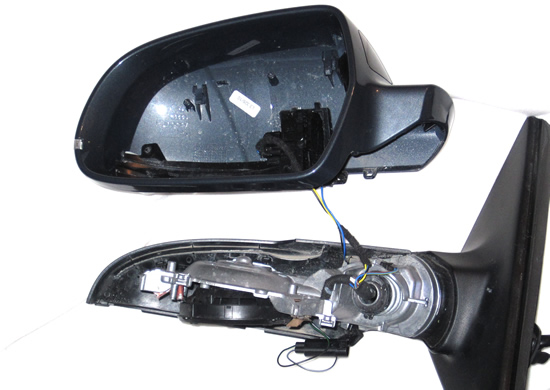
Now you have two plugs to undo if you have lane assist or one if you have no options and just the turn signal.
Here is a picture of the two separated with the plugs still attached.
Release the Lane Assist plug
Release the turn signal plug and your done the disassembly
Now you can reassemble the mirror using the new assembly. Watch your wires and make sure they are routed the same as they where before taking them apart to prevent them getting caught in the motors.
Our next step is to put the new trim and switch into the door panel.
Please note: AudiEnthusiast.com is in no way associated to Audi or VW in any way shape or form. All brand names and manufacturers listed here are for informational purposes only and are in no way endorsed by AudiEnthusiasts.com unless stated other wise.
WARNING!! All modifications and changes are done at your own risk. This site in no way approves the modifications performed here for your vehicle. Please check with your dealer before performing any changes as they may void portions of your factory warranty.