.: Steering Wheel and Stalks
There are a number of reasons why you would want to swap these out. Perhaps you got an S-Series wheel for you A4 or perhaps you want to take advantage of the extra programs that can be enabled in the DIS.
For the ROW my understanding is Cruise control is not standard on all cars and this may be a way for you to add it in.
Regardless of the reasons here is how you go about removing and replacing your steering equipment.
Now this is a fairly easy install so I would rate it 3 out of 10 for difficulty.
*Note: Depending on the reason why you are swapping these out you may need a Vag Com cable for programming or clearing errors.
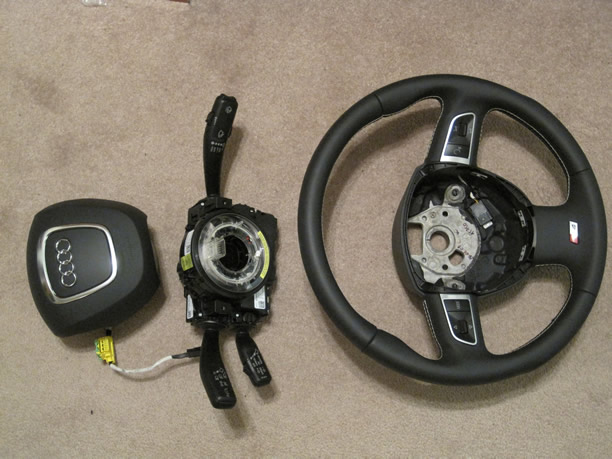
It would be impossible to list all the different parts needed for this swap since there are a number of wheels and controls that can be used and the reason for swapping. So assuming you have compatible parts lets move into the tools and installation.
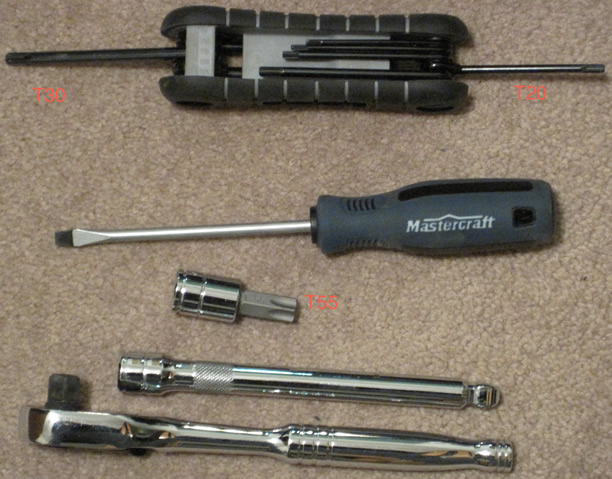
The tools you will need:
1 - T20 Screwdriver
1 - T30 Screwdriver
1 - T55 Socket
1 - 3/8 Drive socket wrench
1 - 3/8 extension
1 - 10 mm wrench
1 - Slot Screwdriver
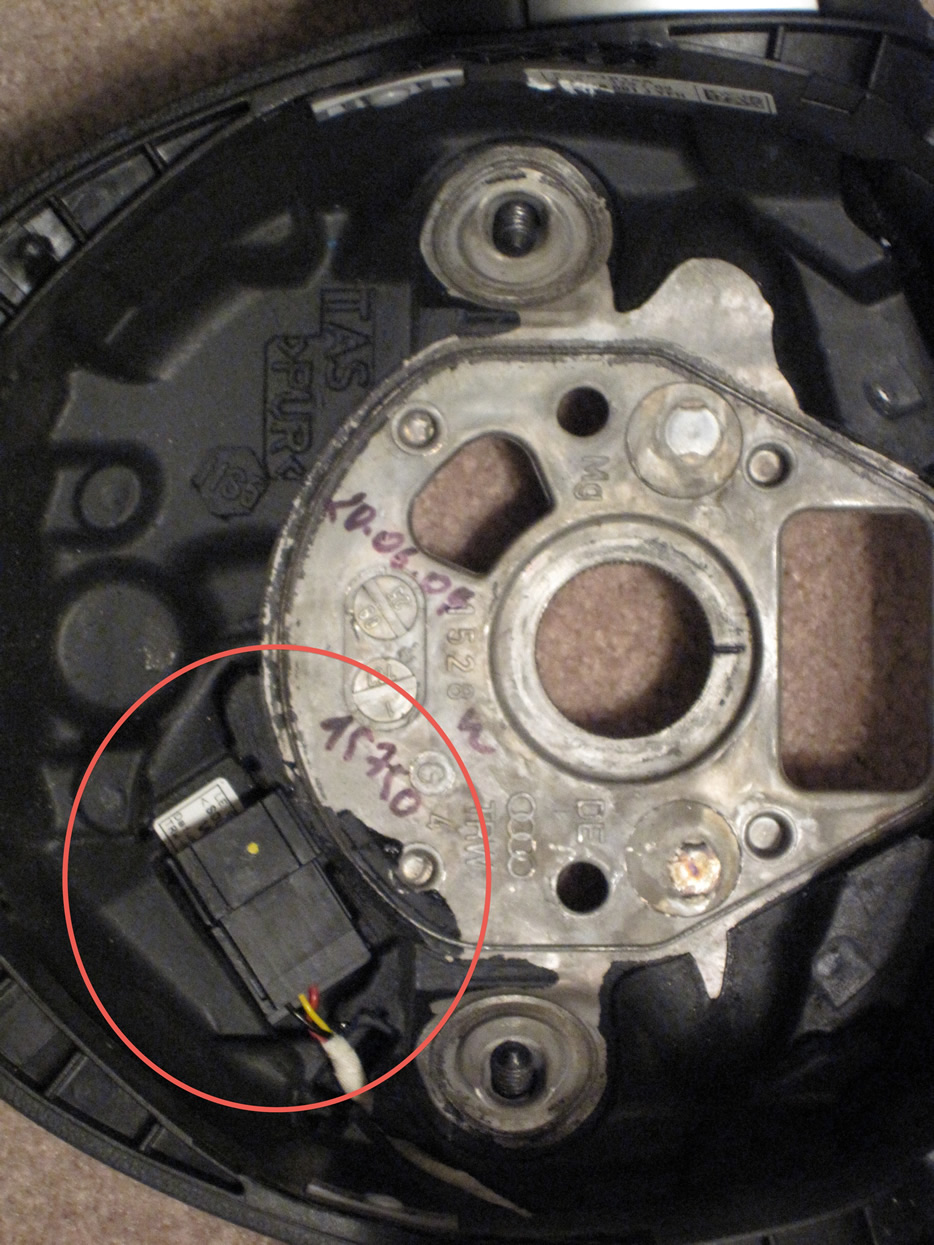
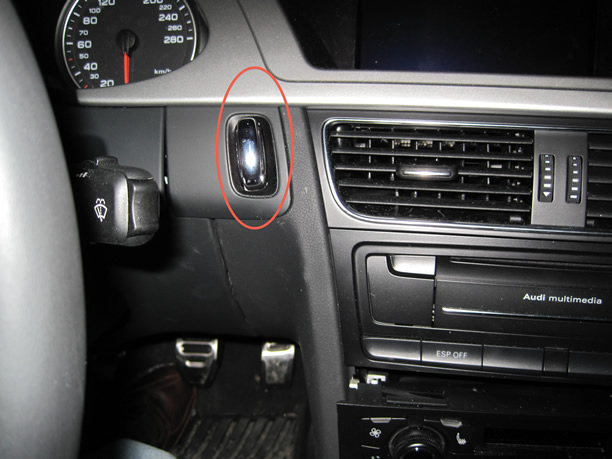
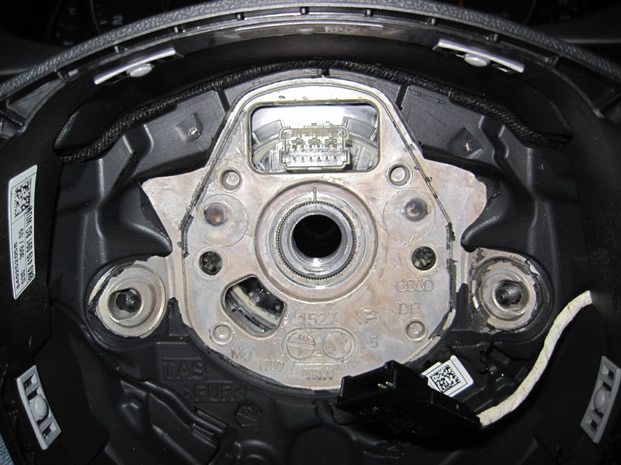
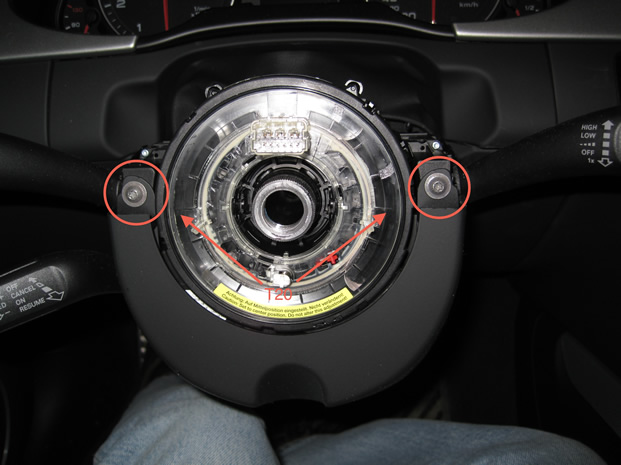
Take a look at the pictures below so you have an idea of what your working with. There is one plug attached to the steering wheel and 2 hidden T30 screws.
Before you begin Audi recommends that you disconnect the battery to prevent any airbag issues. They instruct to leave the key in the ignition to drain any residual power after the battery is disconnected.
I removed the ground (using the 10mm wrench) as recommended then closed the cover on the battery to prevent the cable from touching accidentally.
Step one after the battery is to remove the steering wheel.
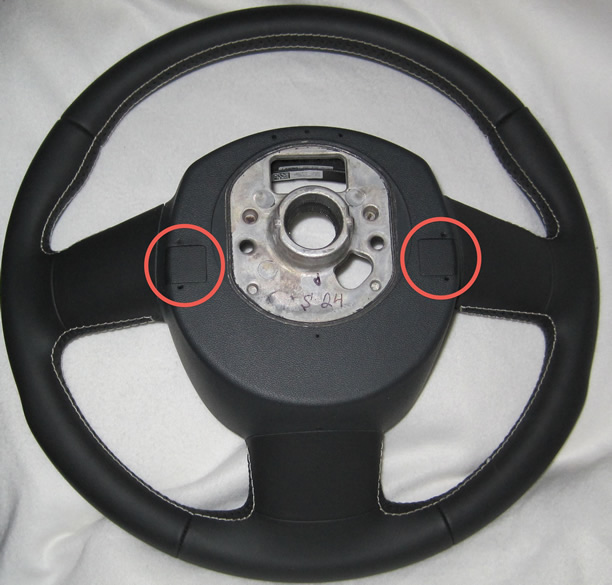
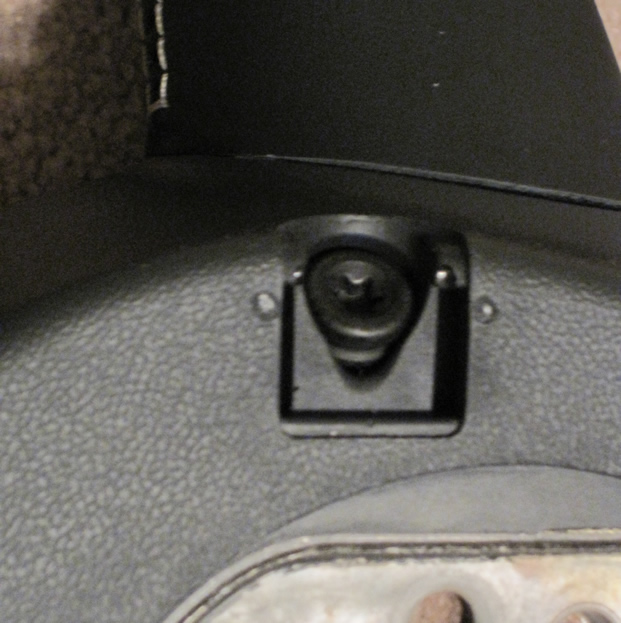
Turn the steering wheel so that the screws on the rear of the steering wheel are at the top and bottom of the steering wheel (this will make access easier).
If you have a bit of a thumb nail you can pop off the covers for the screws or get a small screw driver and work them off. It can be tricky since they are facing away from you.
Now take your T30 and remove the two screws. Remember your probably facing the wheel and working backwards so twist the right way. Once the two screws are undone the air bag will pull out. Don't pull two far there are 2 plugs to be undone.
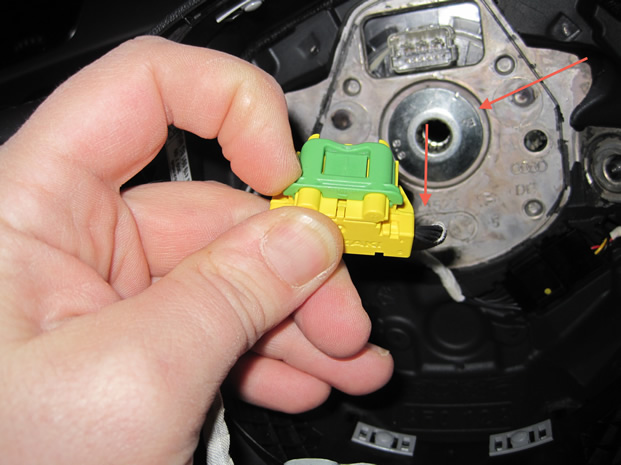
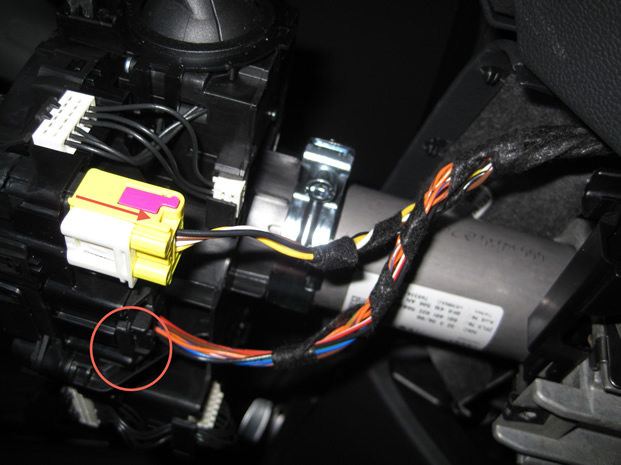
There is the one small plug you seen above and the second is for the entire airbag/steering-wheel that attaches to the steering stalk. It is a spring loaded clip so you have to pull up on the green release then pull the plug out.

Once the plugs are undone re center your steering wheel. Now grab your T55 and undo the center bolt. You may find it helpful to rest your knee against the wheel to stop it from trying to spin. It comes out pretty quick so not to worry. There is blue thread lock on the bolt so expect a bit of torque needed to get it started.
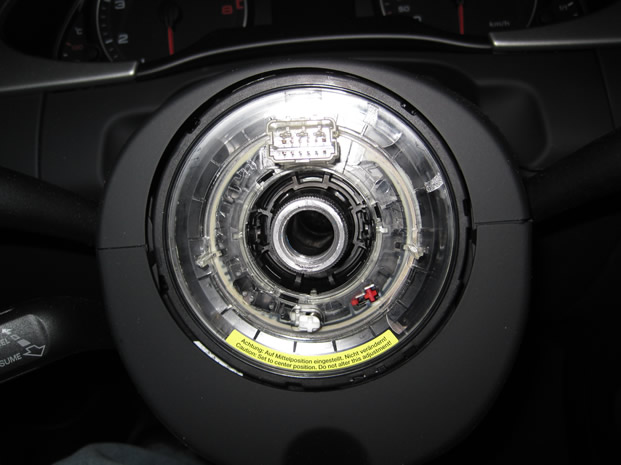
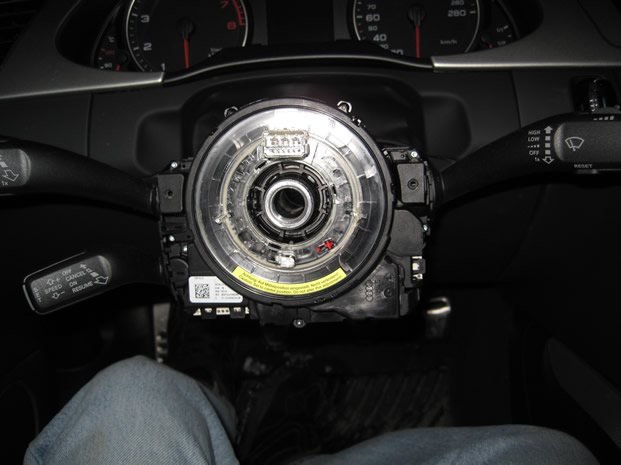
Your now ready to remove the wheel.
Just pull and off it comes. Double check your wheel you should see a line where it matches up with the shaft so you put it back on in the correct position.
If your just doing the steering wheel put on the new one and reverse assembly. If your swapping stalks lets get going.
Stage 2:
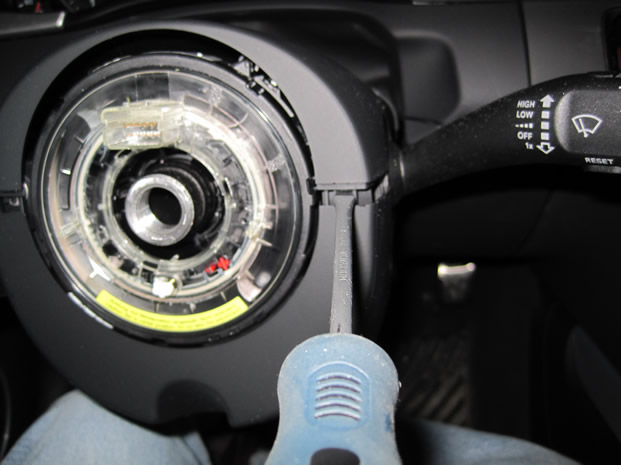
Take a slot screw driver and pop the trim at the back of the steering column. As you will see by the picture they are just round push clip. Once you get it started get your hands in and pull it up. Leave it in place you aren't removing the back part.
There are two release clips on the front of the trim panel. Push your slot screwdriver in and they will release. Pull the trim piece towards you. It slides in place so you can't just pull it up you have to slide it towards you.
Lower trim:
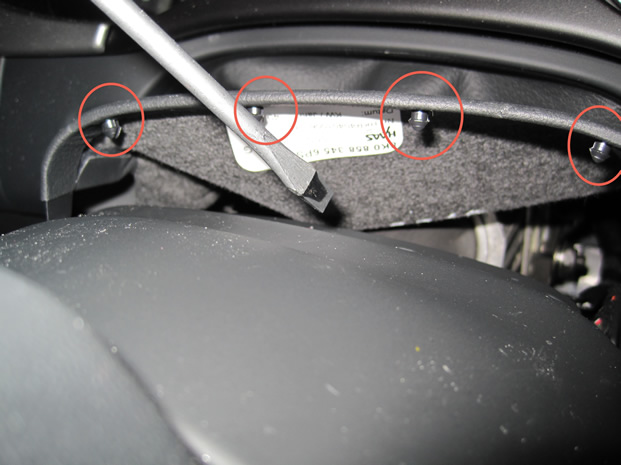
You'll require the T20 Screwdriver to remove the next 3 screws. Remove the two front screws shown.
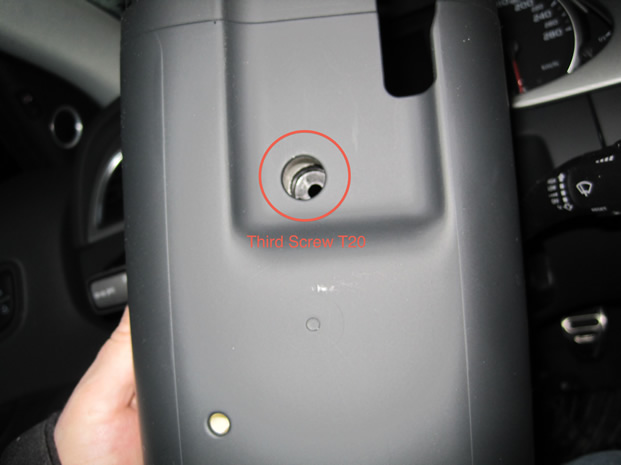
Feel under the trim until you find the hole. Then remove the third screw from the trim panel.The lower trim part will now pull out.
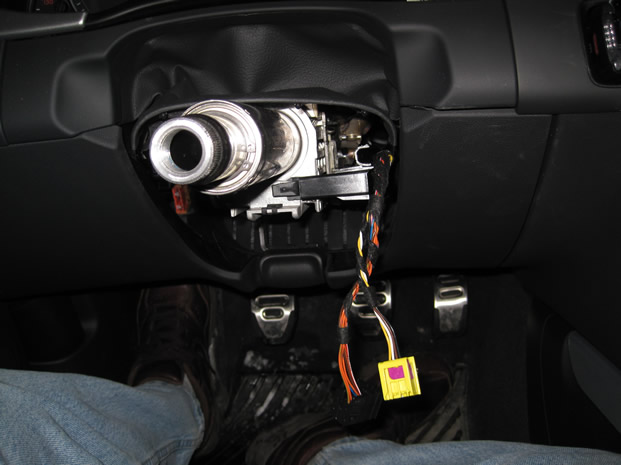
Before you can proceeds you have to undo two plugs. One is just like the air bag plug and the other has a regular push down release.
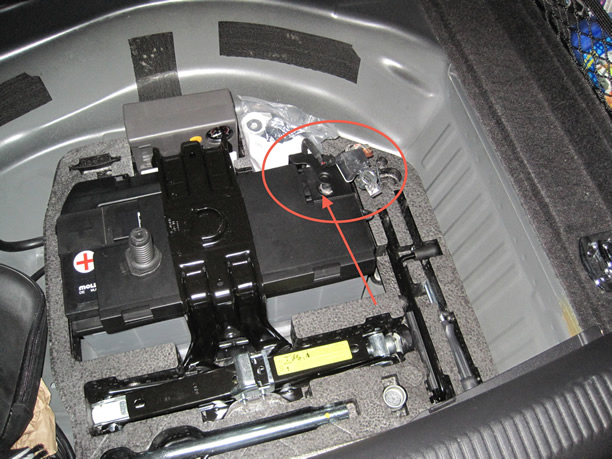
To remove the stalks you have to remove one T30 bolt. Loosen this bolt and the entire stalk assembly will pull off.
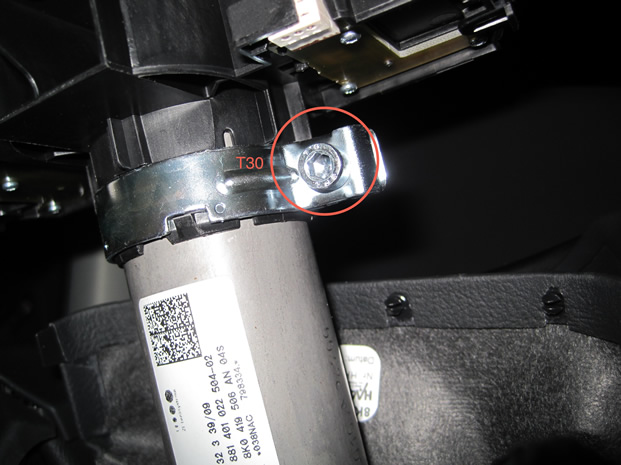
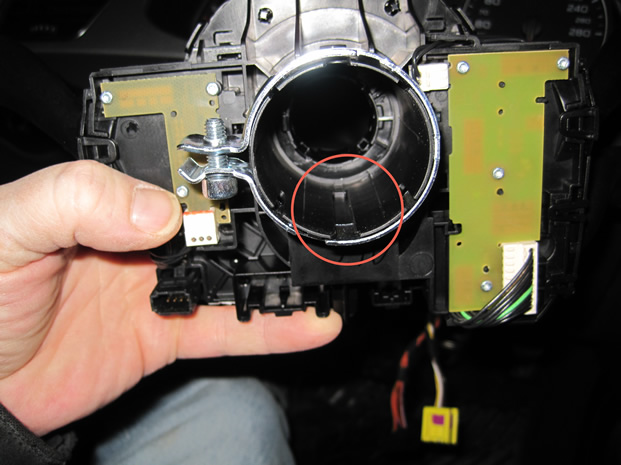
Note: the stalk is keyed so it will go back on in only one position so don't worry about marking it.
There you go. Reverse procedure for assembly. Depending on your installation you may require some programming. If you get errors after installing they are most likely caused by the steering angle sensor. Log into VCDS (Vag Com) go to the steering module and run through the tests there. Once done you should be able to run an auto scan then clear the DCT's.
*Note: Some people are buying steering wheels from different models and installing them onto the B8. This is possible and there are some nice wheels out there. They may not be keyed like the B8 and the yellow plug may also be slightly different. One person reported being able to alter the new plug slightly so it plugs in to the factory B8 stalks, others have cut off the plug and switched it with the one from their factory wheel. If I was performing a mod such as this I would personaly use a pin removal tool to remove the wires from the plug and replace it with the proper one that you can order from your dealer. Audi pin removal tools are available on ebay or from Audi's tool supplier direct. Just be aware of your options. These instructions are for a straight swap, check out Audizine for swapping wheels with something like the TT or RS6.
Please note: AudiEnthusiast.com is in no way associated to Audi or VW in any way shape or form. All brand names and manufacturers listed here are for informational purposes only and are in no way endorsed by AudiEnthusiasts.com unless stated other wise.
WARNING!! All modifications and changes are done at your own risk. This site in no way approves the modifications performed here for your vehicle. Please check with your dealer before performing any changes as they may void portions of your factory warranty.